
How to connect to your Facebook Page(s)
Connecting your Facebook Pages to the Social Planner allows you to schedule, manage, and publish posts directly from your dashboard.
[!IMPORTANT] Prerequisites for Connecting Facebook Pages:
- You must have full Admin rights on the Facebook Pages you want to connect.
- You must log in with the personal Facebook profile that holds these administrative rights.
- Due to Facebook’s API changes, publishing directly to personal Facebook profiles is no longer supported. You can only publish to Facebook Pages (though you use your profile to authorize them).
[!NOTE] If you have previously connected Facebook Pages and wish to add new ones, you must first go to your Facebook account’s Settings > Business Integrations and “Remove” the existing application. Once removed, you can follow the steps below from scratch to re-authorize all your required pages.
Setup Guide
Section titled “Setup Guide”Follow these instructions to successfully authorize and connect your Facebook Pages.
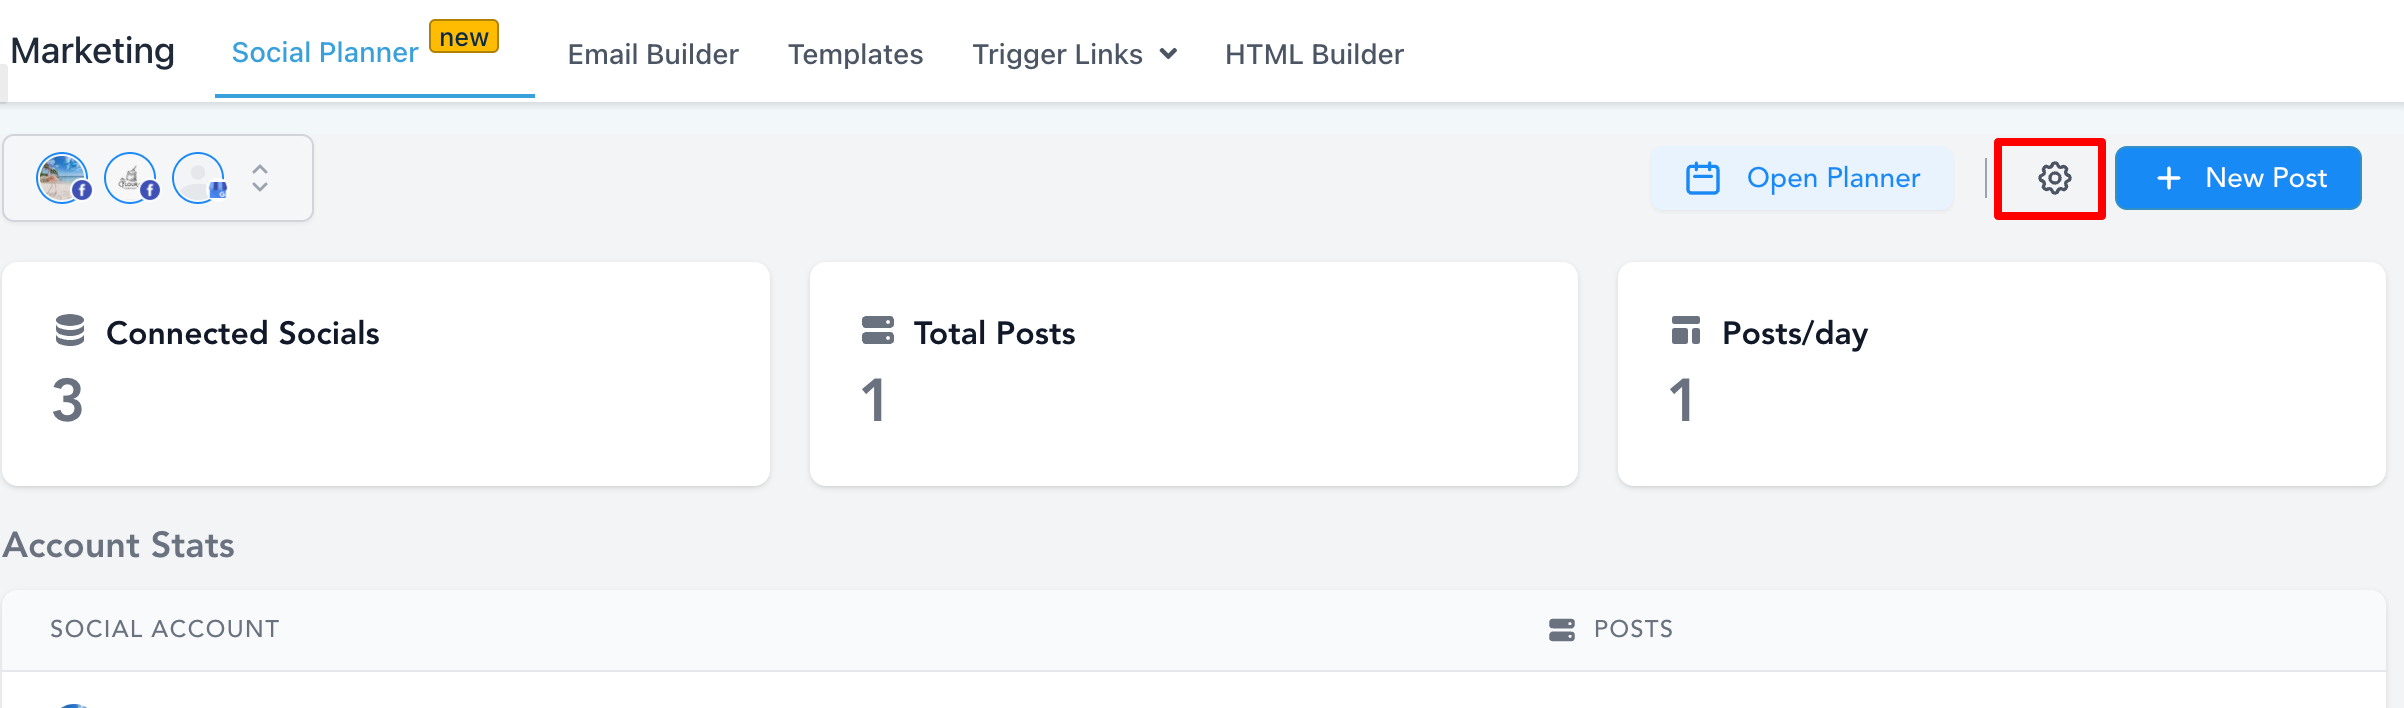
Step 1: Go to Social Planner Settings
Section titled “Step 1: Go to Social Planner Settings”Navigate to your Marketing module and open the Social Planner. In the top right corner, locate the gear icon to open your Settings.
Step 2: Connect a New Facebook Page
Section titled “Step 2: Connect a New Facebook Page”Within the Settings table, find the option to manage multiple Facebook pages and click on Connect a new Facebook Page.

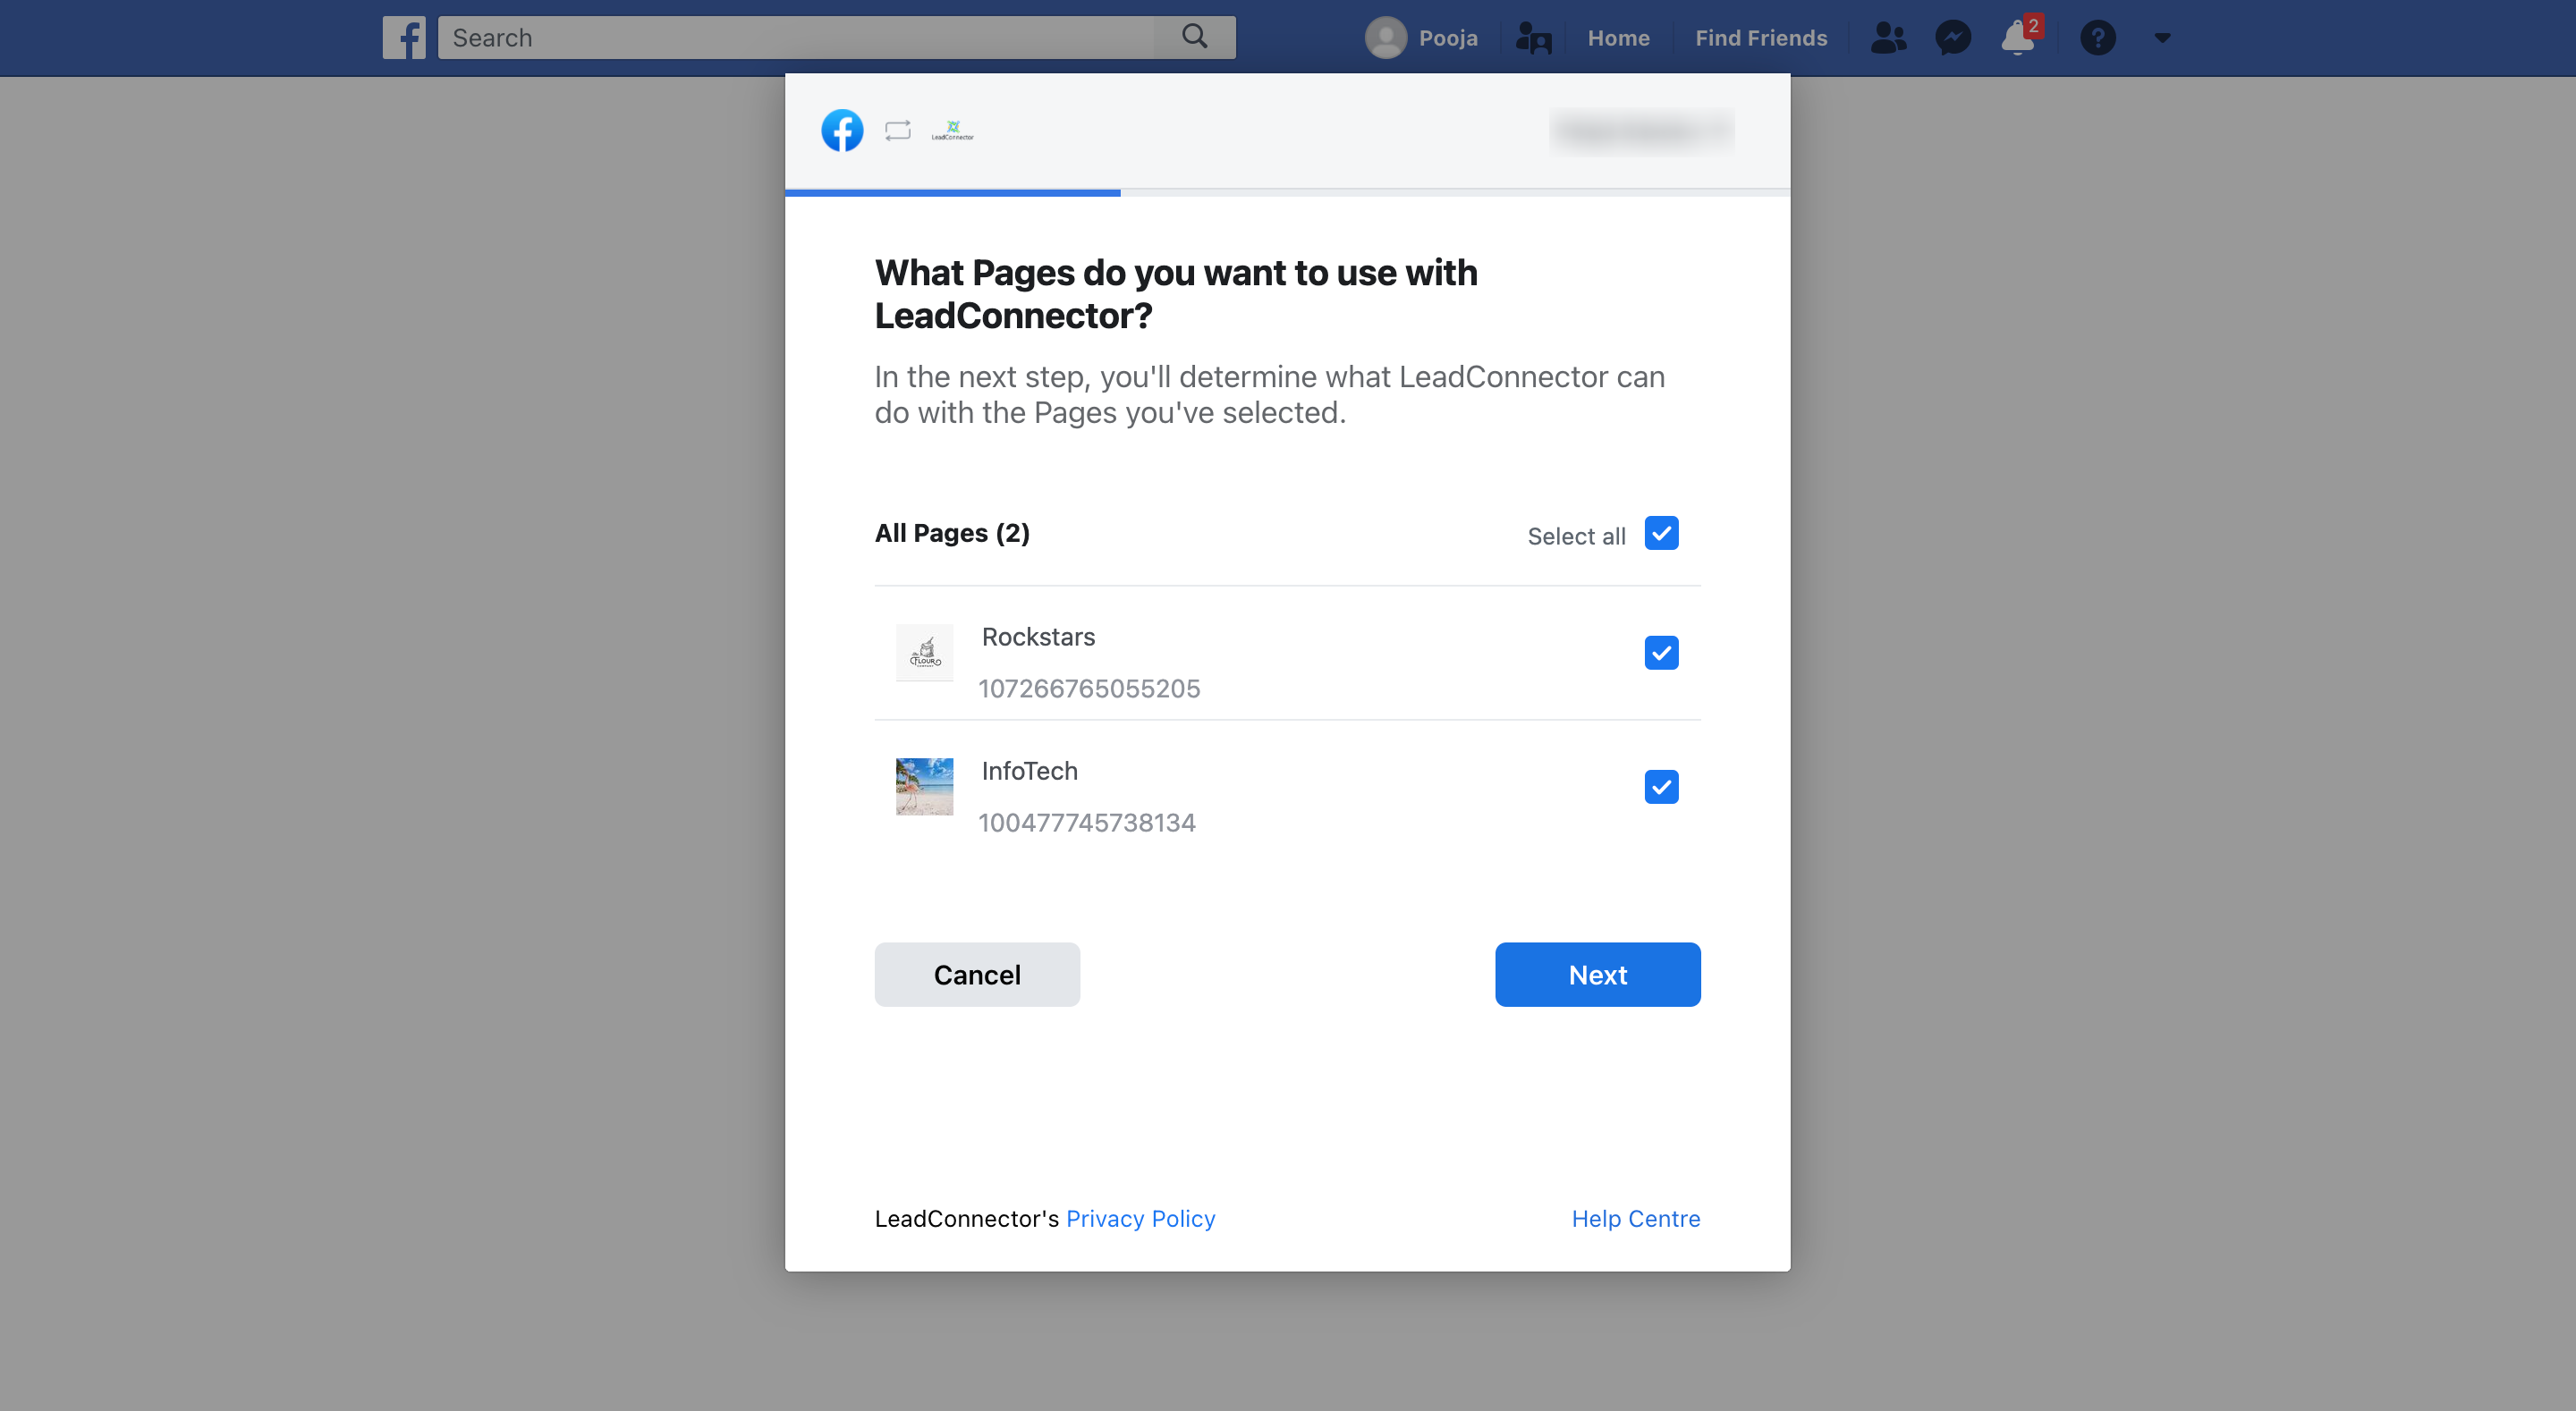
Step 3: Grant Required Permissions
Section titled “Step 3: Grant Required Permissions”If this is your first time connecting a profile (or if you are reconnecting after removing the integration), you must grant the system full permissions. Click Continue when prompted to authorize the application to fetch your associated Facebook Pages.

Step 4: Select Your Facebook Pages
Section titled “Step 4: Select Your Facebook Pages”The system will display a list of all Facebook Pages associated with the authorized profile. Simply select the checkboxes next to the specific pages you wish to connect to the Social Planner.
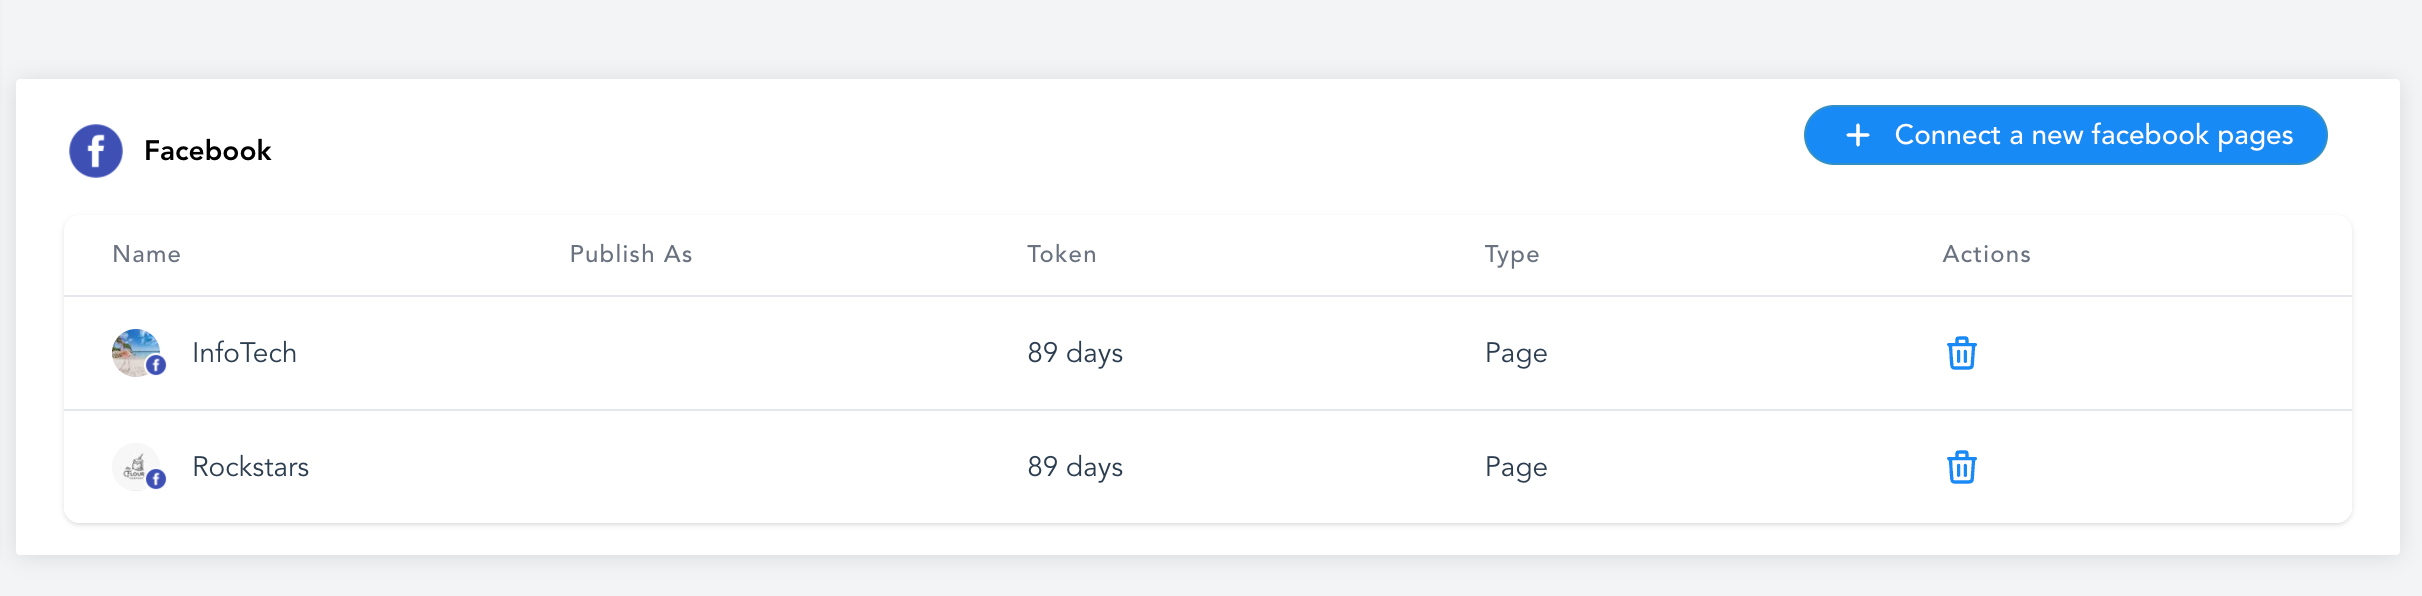
Step 5: Verify Your Connection
Section titled “Step 5: Verify Your Connection”Once selected, verify your integration. All the pages you authorized in the previous step will now be listed in your integrations table, indicating a successful connection.
Following these instructions, you can attach as many pages as needed. If you manage pages across different personal Facebook profiles, you can repeat this process to add them all into your centralized Social Planner.