
How to Create Service Menus for Calendars
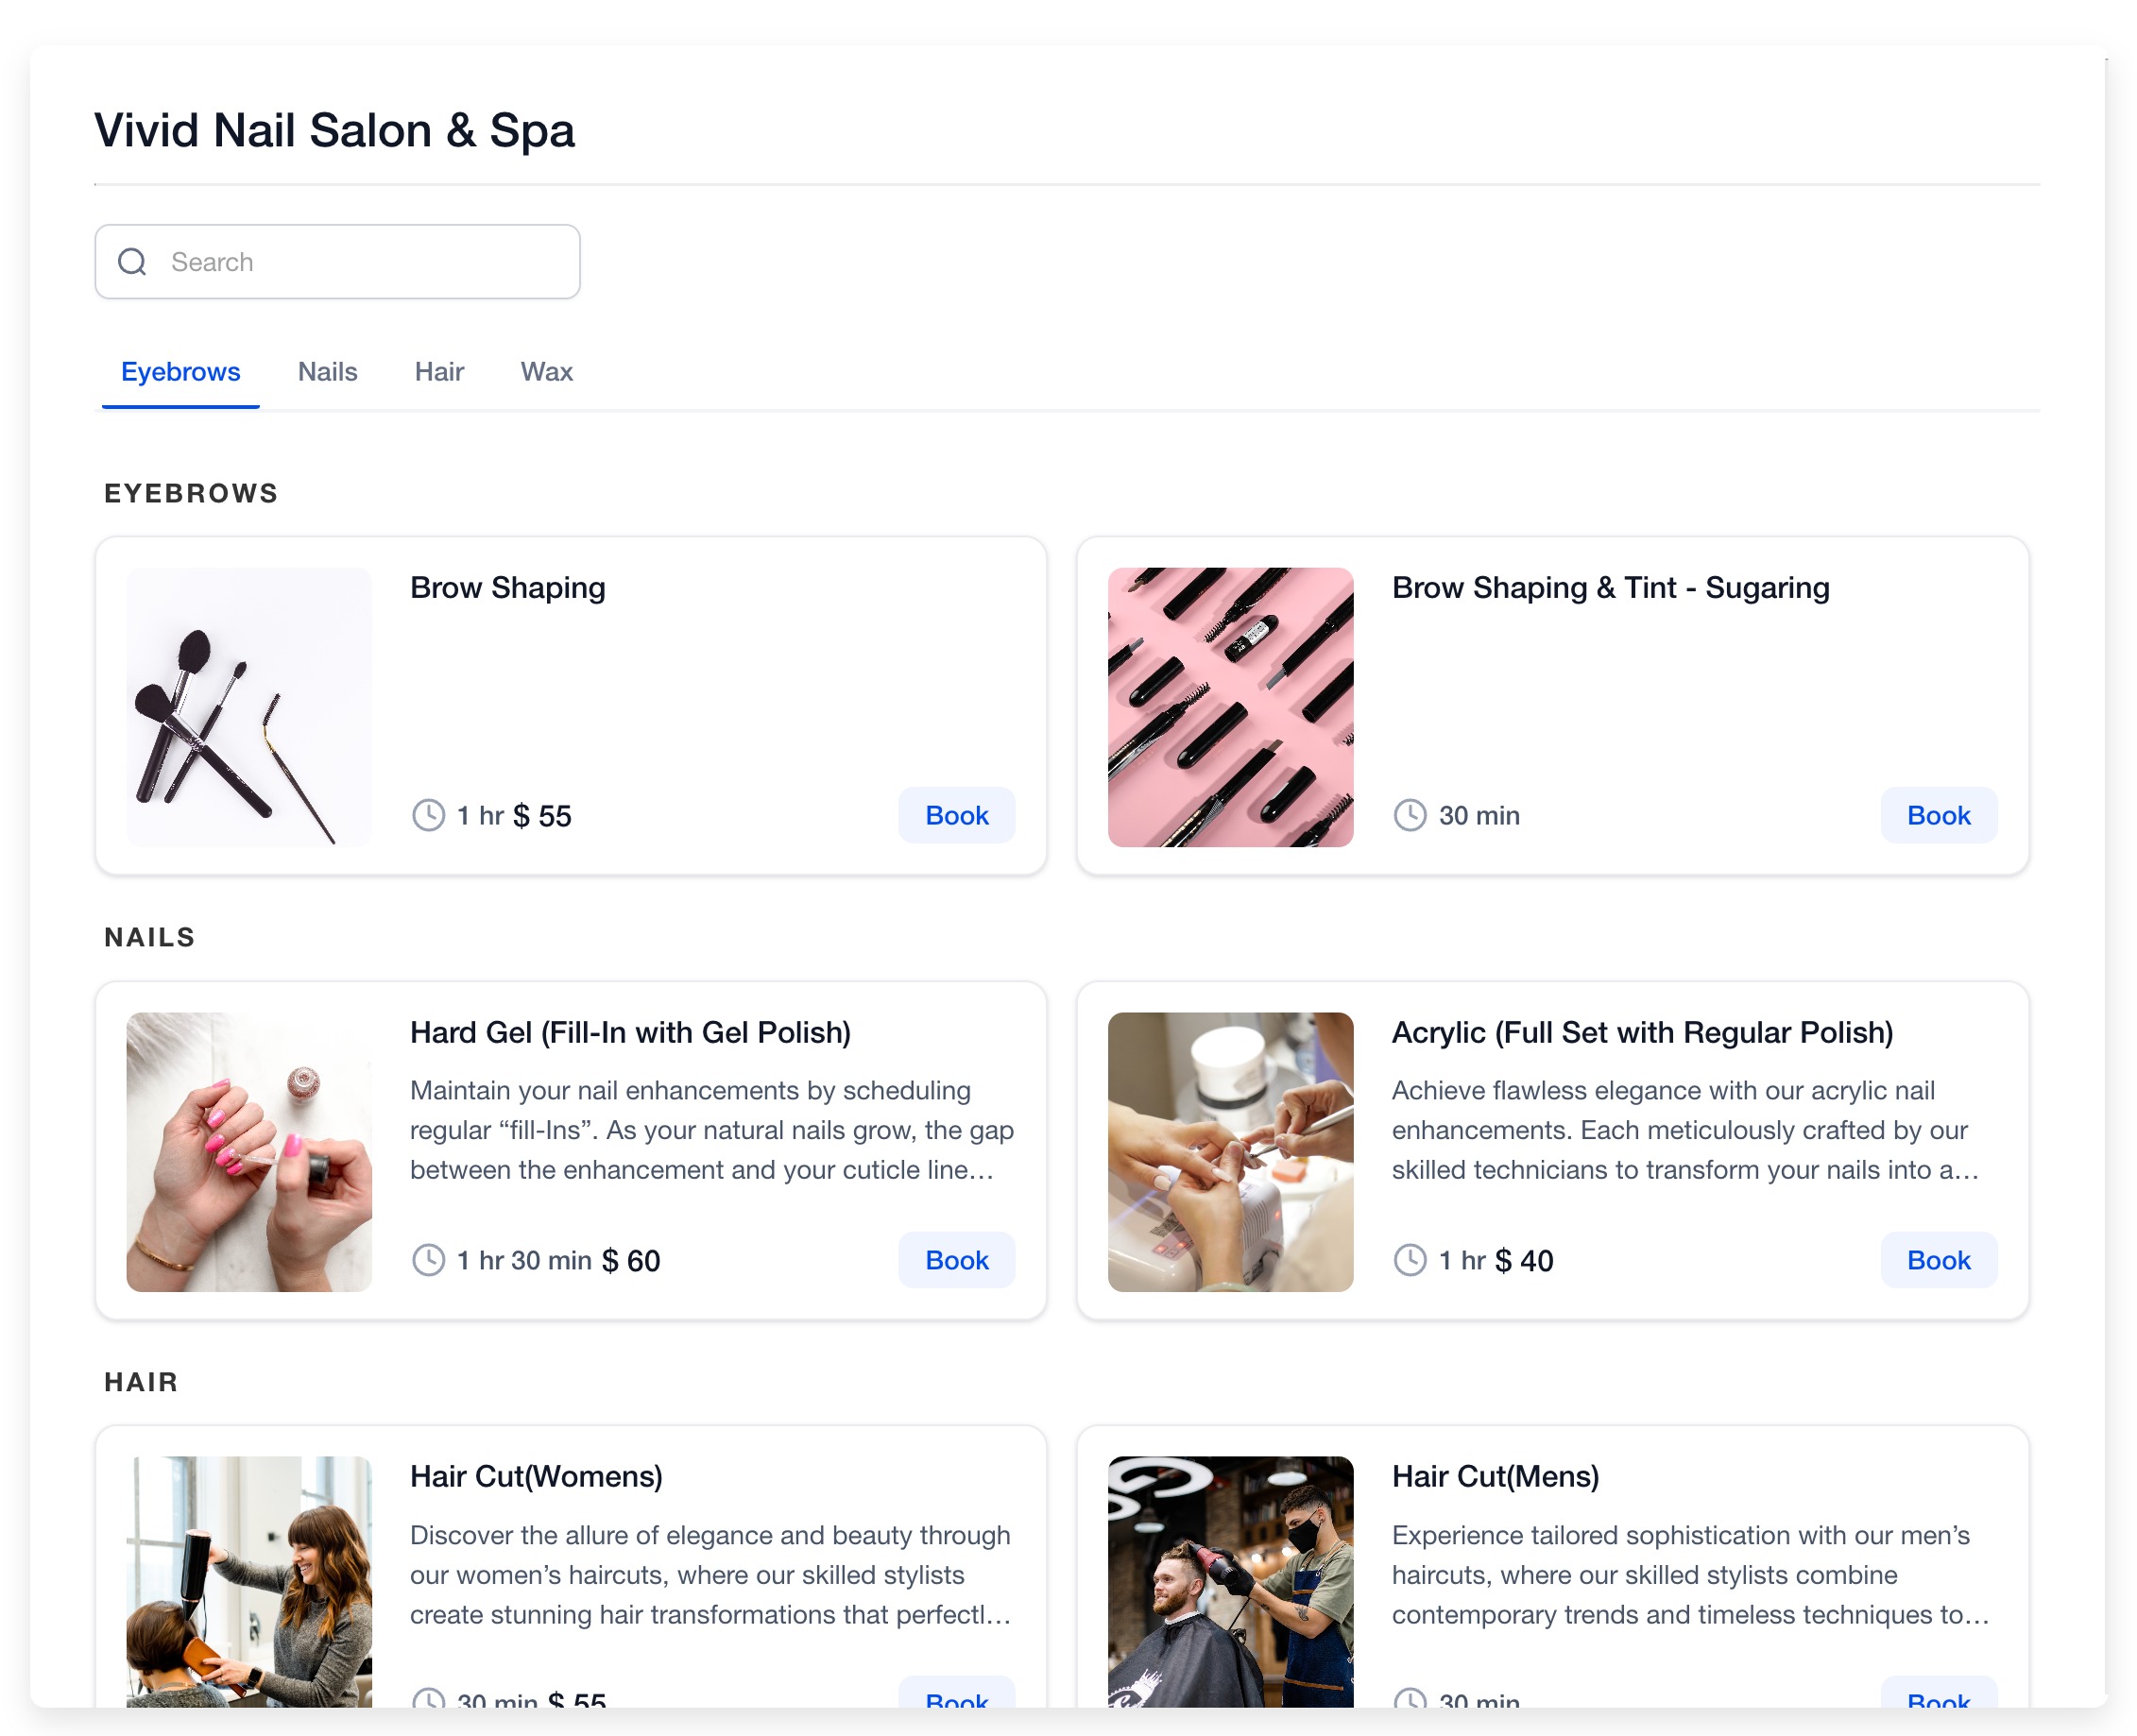
Service Menus allow you to list multiple services in a single branded interface, enabling clients to efficiently book various appointments in one flow. Each service connects to a unique Service Calendar, giving you full control over availability, pricing, and duration.
1. Key Benefits
Section titled “1. Key Benefits”- Centralized Experience: Consolidates all services so clients can effortlessly browse and book.
- Provider Selection: Allow clients to select their preferred staff member.
- Service Categorization: Neatly groups services via Group Calendars.
- Independent Configuration: Every service is tied to its own dedicated calendar with custom rules.
2. Prerequisites
Section titled “2. Prerequisites”- Create a Service Calendar: Set up a dedicated calendar for each service offered.
- Create a Calendar Group: Group your Service Calendars together so they can be securely bundled into a Service Menu.
3. Creating a Service Menu
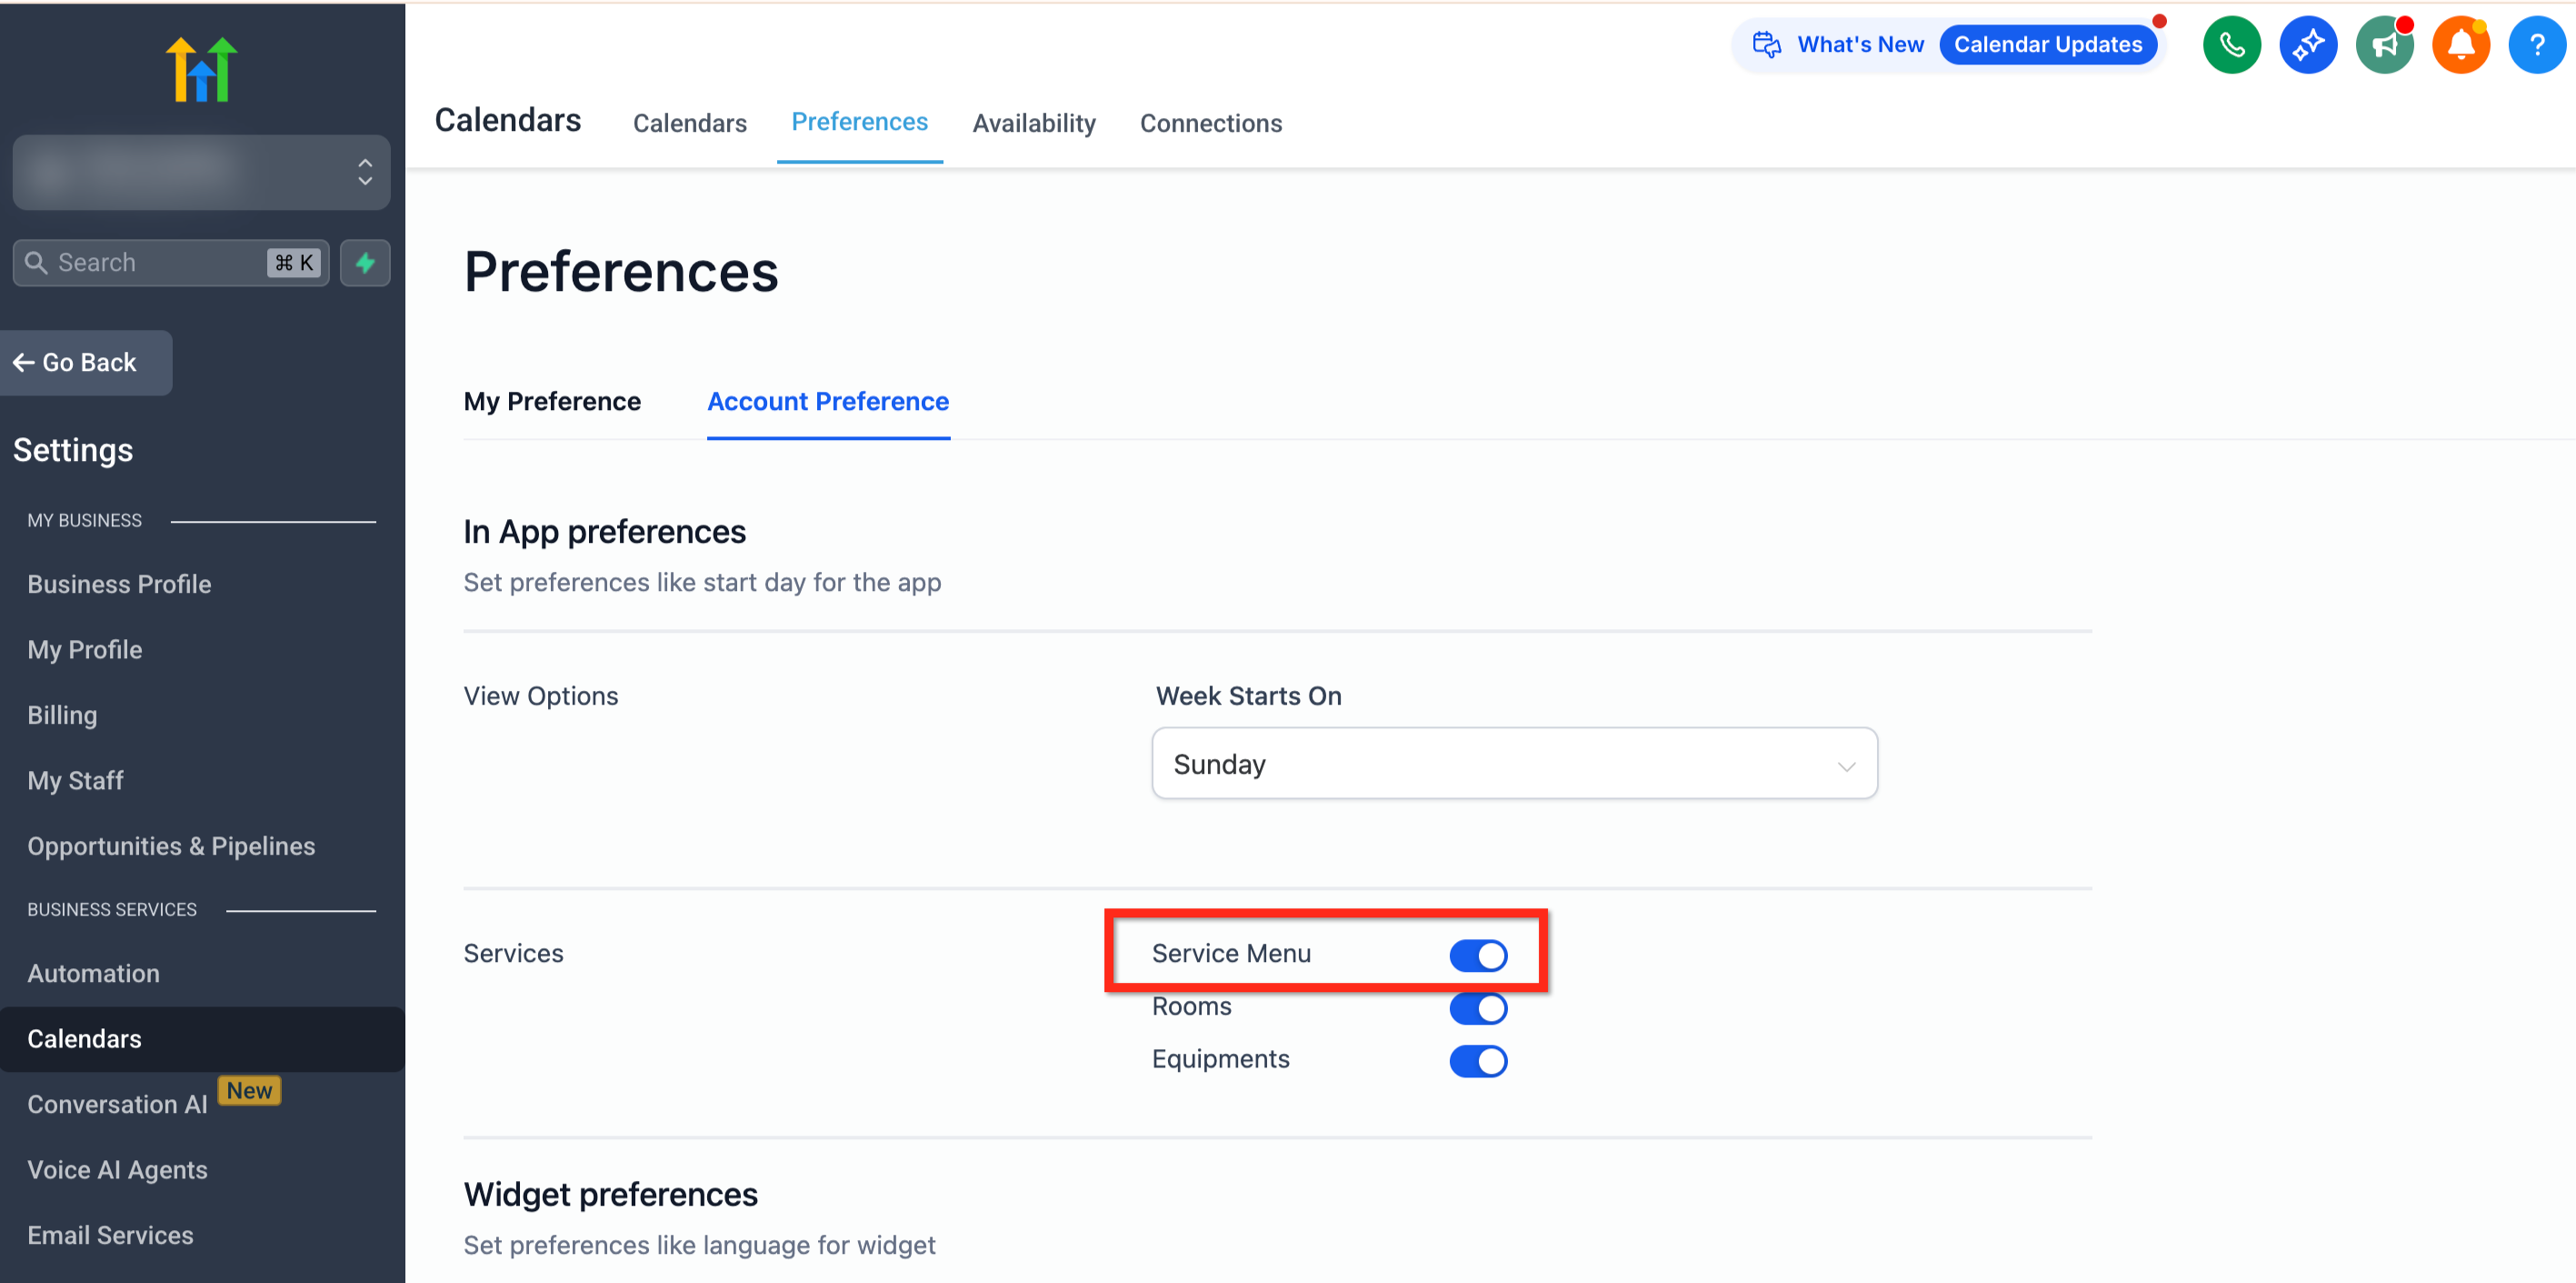
Section titled “3. Creating a Service Menu”Step 1: Enable the Feature
Section titled “Step 1: Enable the Feature”- Navigate to Calendars > Calendar Settings > Preferences.
- Click the Account Preference tab.
- In the Services section, toggle ON the Service Menu.
Step 2: Build the Menu
Section titled “Step 2: Build the Menu”- Go to Settings > Calendars and click the Service Menu tab.
- Click Create Service Menu.
- Add a distinct Name, optional Description, custom Slug URL, and select a custom booking Form if additional details are required from the client.

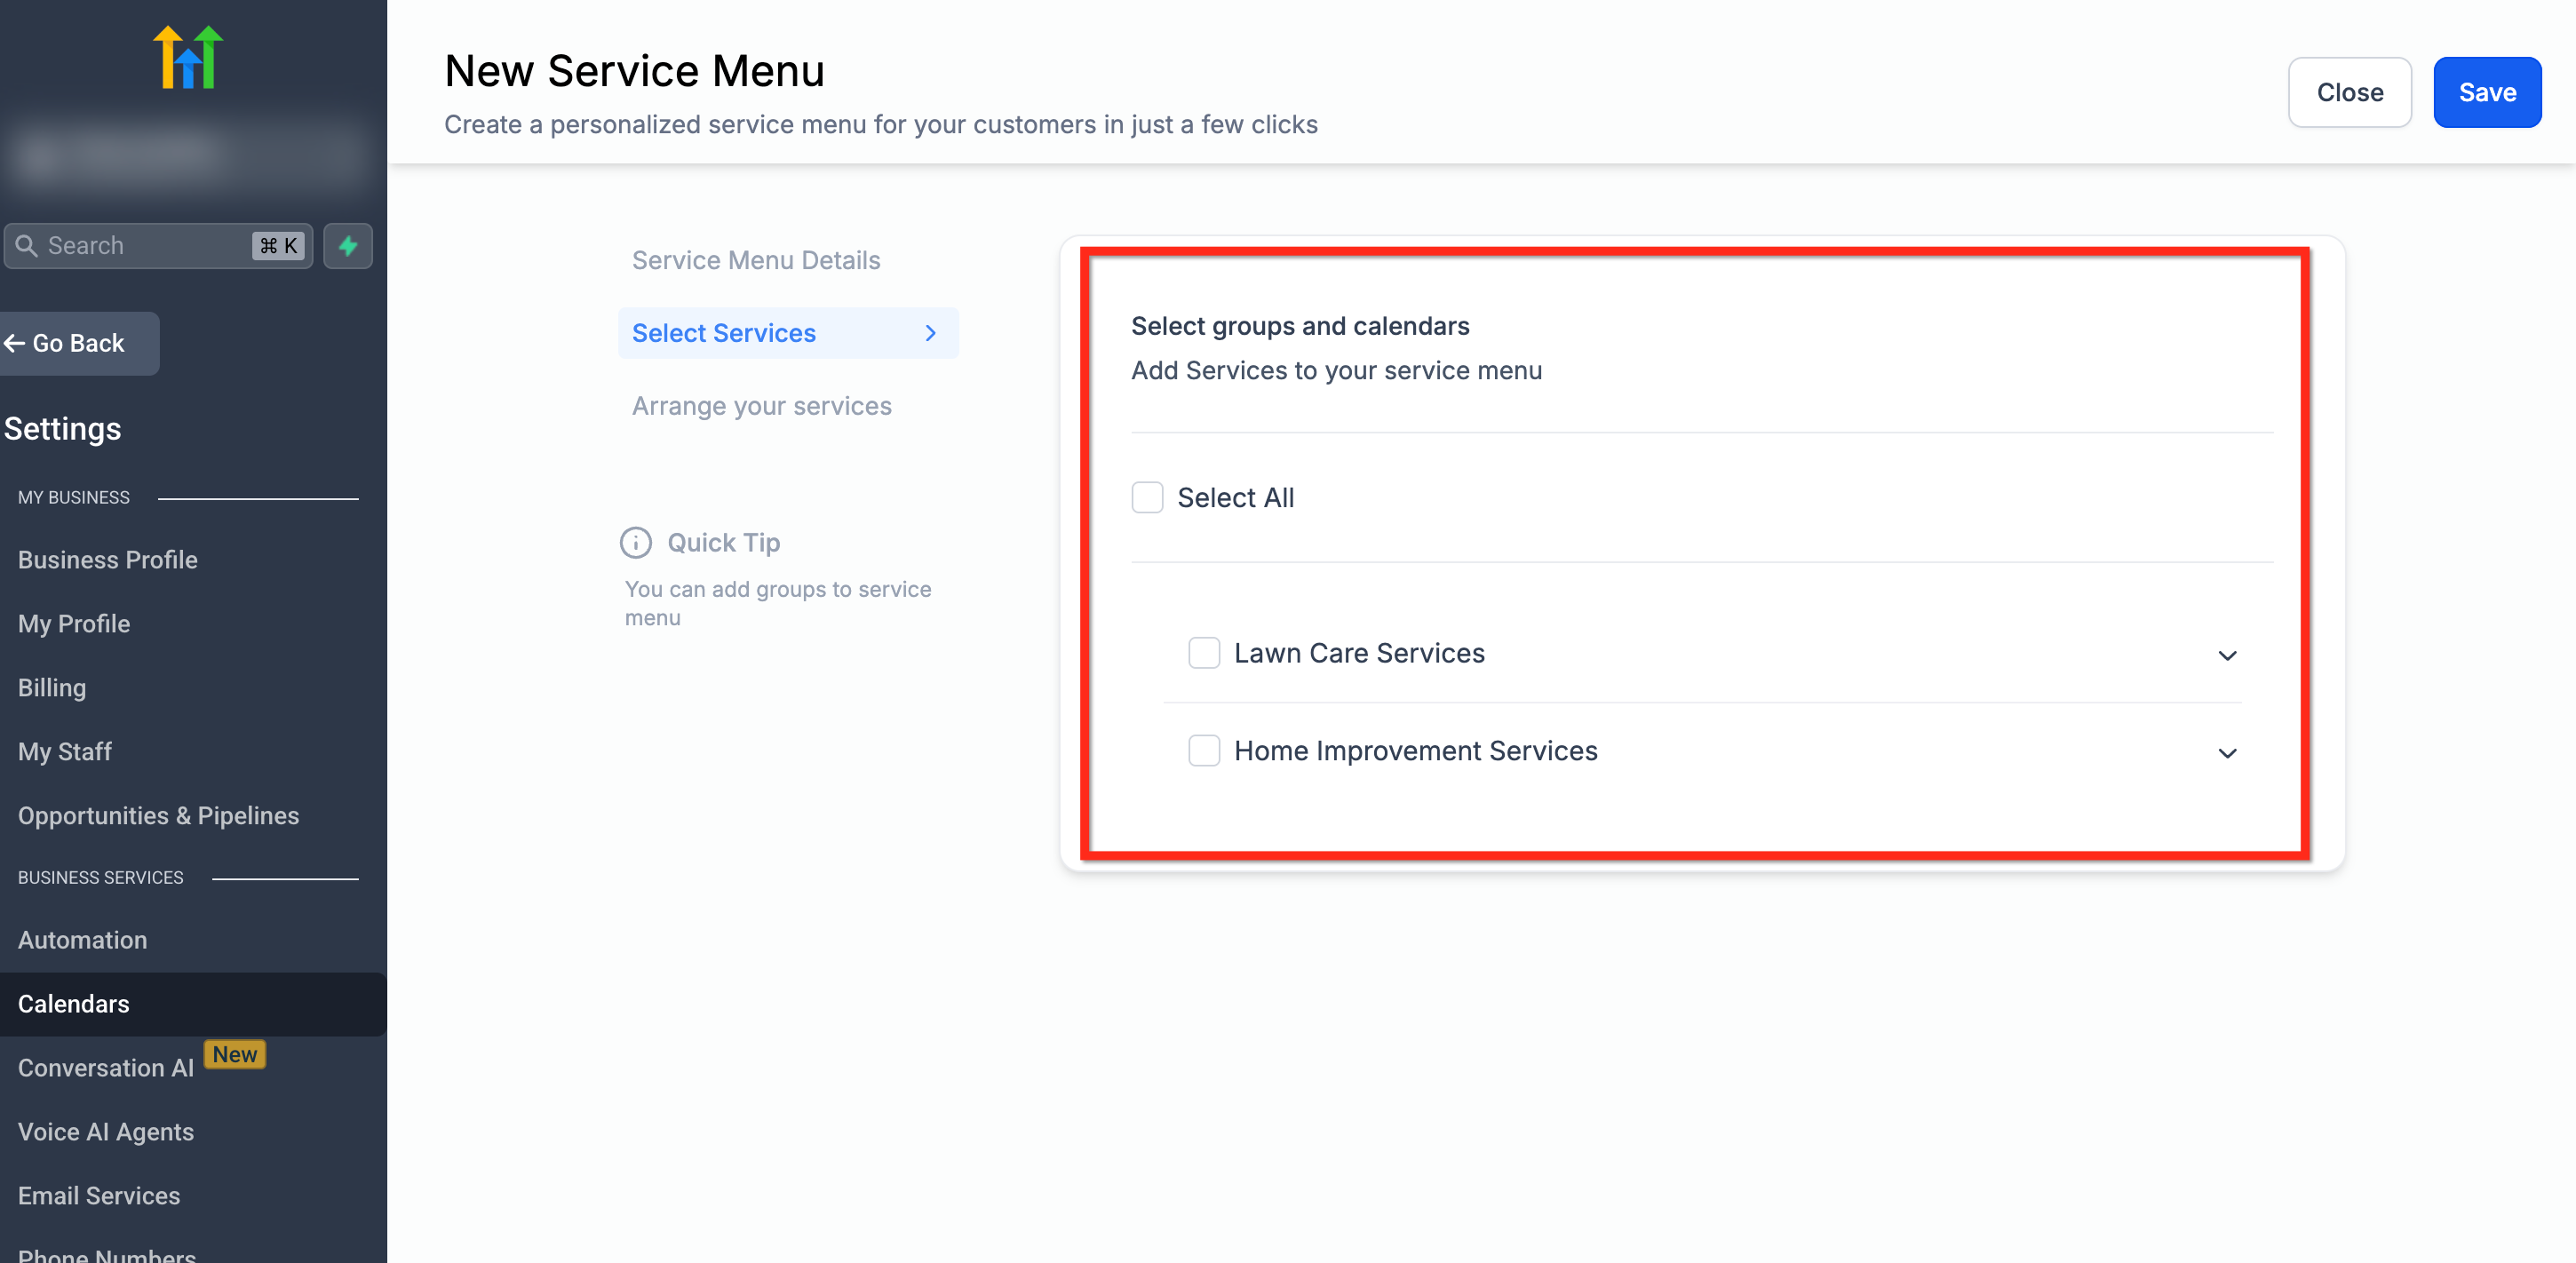
Step 3: Select & Arrange Services
Section titled “Step 3: Select & Arrange Services”- In the Service Menu editor, switch to the Select Services tab.
- Check the boxes for the calendars you want to display on this specific menu.
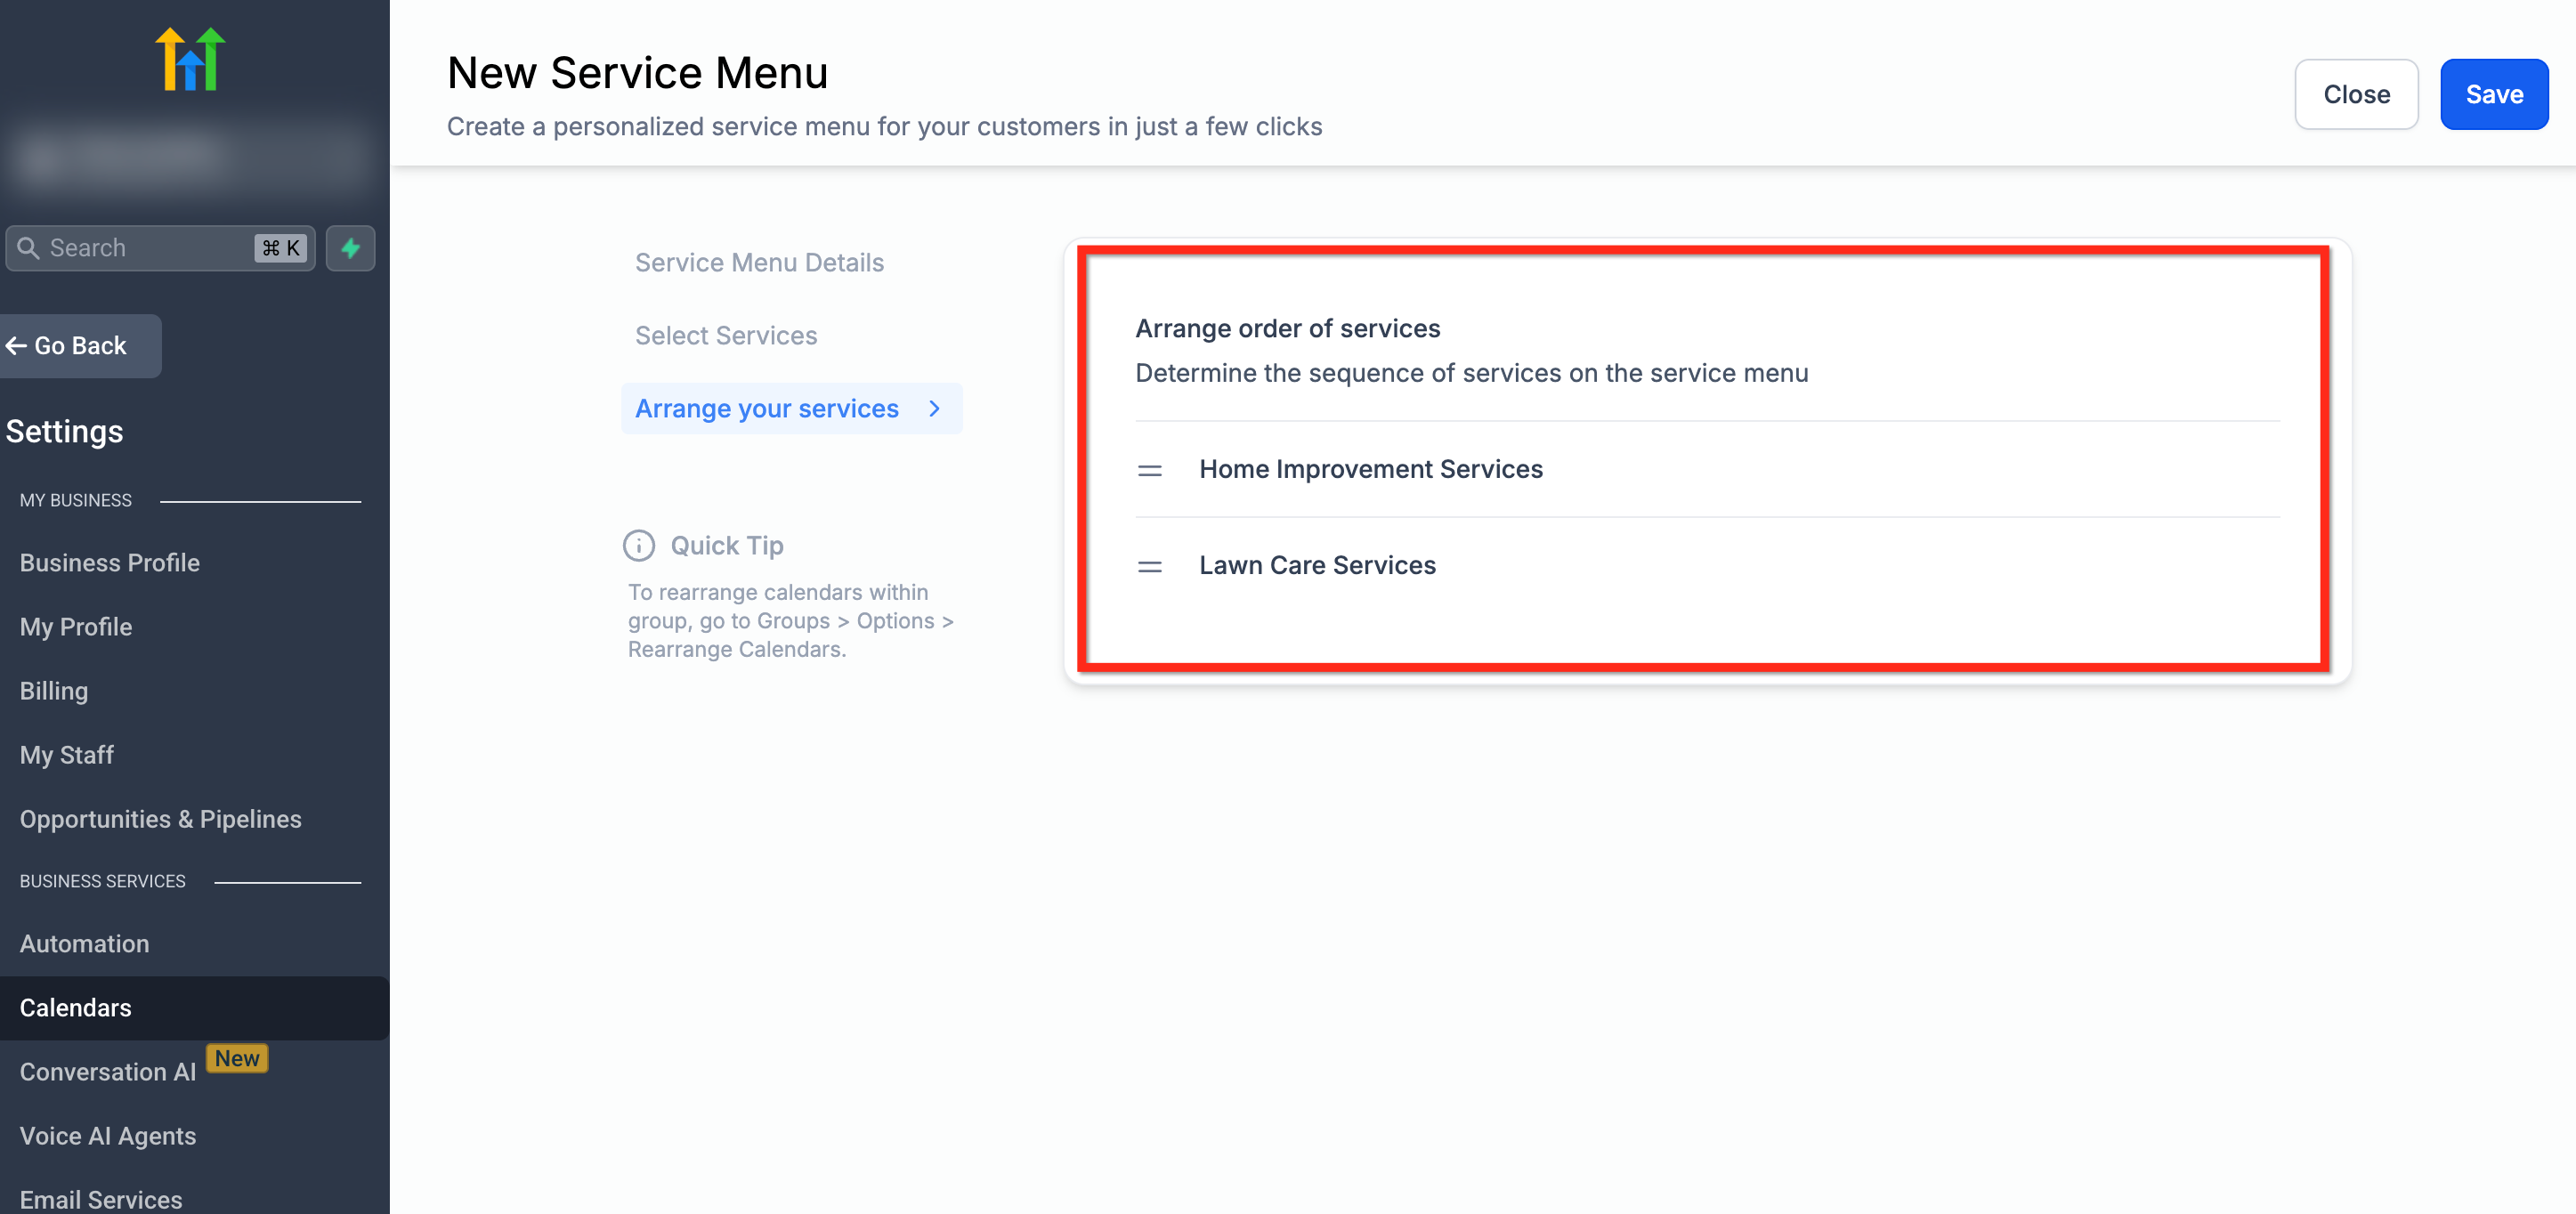
- Simply drag and drop to natively organize their order of appearance.
- Click Save.
4. Limitations
Section titled “4. Limitations”- Current Service Menus exclusively support Stripe payments.
- Client cards are not natively saved for future bookings.
- In-app payments and discount coupon codes are currently unsupported.