
Adding Custom Forms to Calendars
Custom forms can be added to calendars so users provide more information before completing a booking. This helps collect important intake details, improve qualification, and save responses directly into contact records.
Table of Contents
Section titled “Table of Contents”- What is Adding a Custom Form to Calendars
- Key Benefits of Using Custom Forms with Calendars
- How to Set Up Custom Forms with Calendars
- How to Add the Same Form in Multiple Calendars
- Frequently Asked Questions
What is Adding a Custom Form to Calendars
Section titled “What is Adding a Custom Form to Calendars”Custom forms allow you to collect personalized information from contacts before they book an appointment. After a user selects a time slot, the form is presented as part of the booking flow.
This information is then stored in the contact’s CRM record, helping your team personalize communication and improve follow-up.
Before adding a form to a calendar, make sure the form has already been created in your account.
Key Benefits of Using Custom Forms with Calendars
Section titled “Key Benefits of Using Custom Forms with Calendars”Using custom forms with calendars helps you:
- Ask pre-booking questions to qualify leads
- Collect important information automatically
- Save responses directly into contact records
- Improve personalization for follow-up and service delivery
- Reduce back-and-forth by capturing details upfront
- Add consent checkboxes or required agreements when needed
- Trigger automations based on submitted responses
- Create a more structured booking experience
How to Set Up Custom Forms with Calendars
Section titled “How to Set Up Custom Forms with Calendars”Connecting a form to a calendar requires only a few steps.
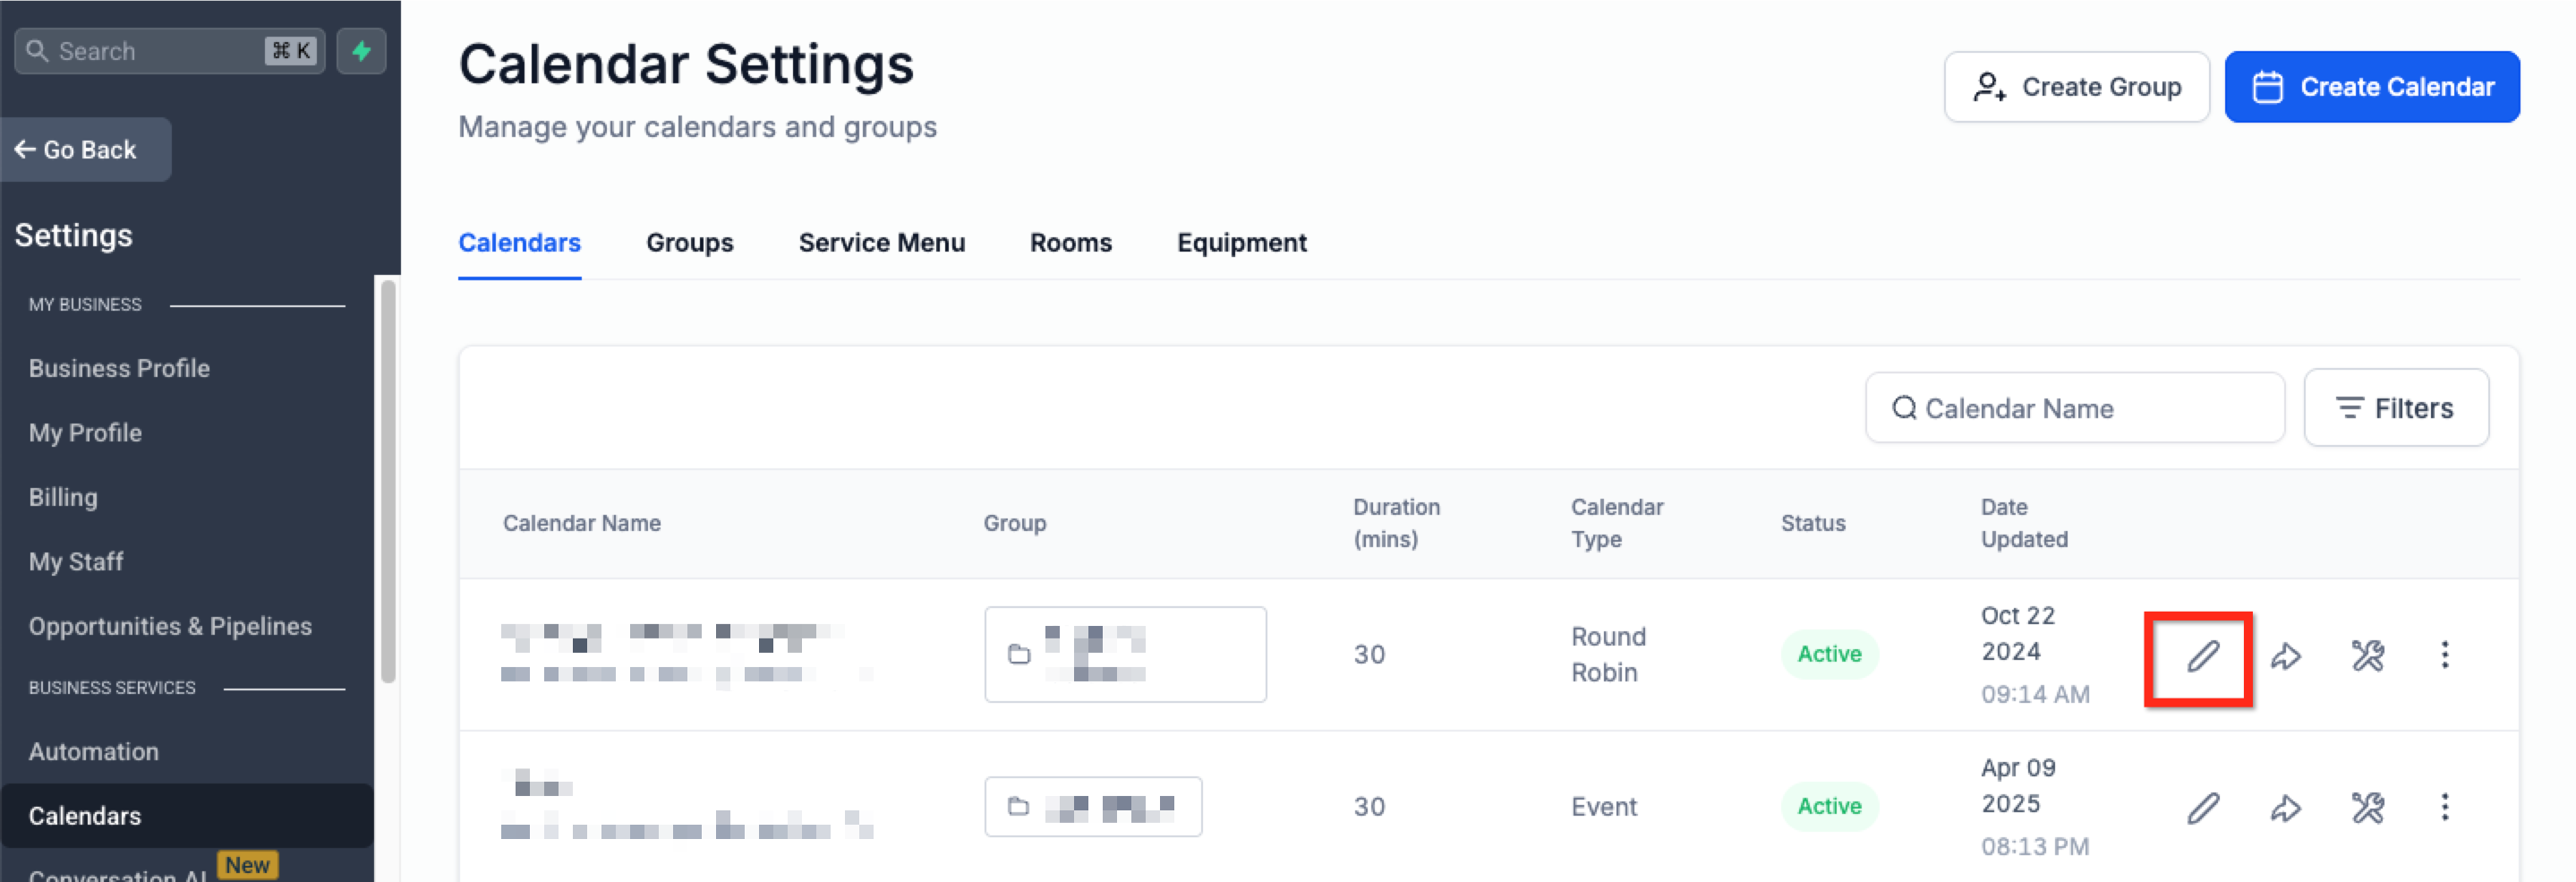
Step 1: Navigate to the Desired Calendar
Section titled “Step 1: Navigate to the Desired Calendar”- Go to Calendars
- Click Calendar Settings
- Find the calendar you want to update
- Click Edit next to that calendar
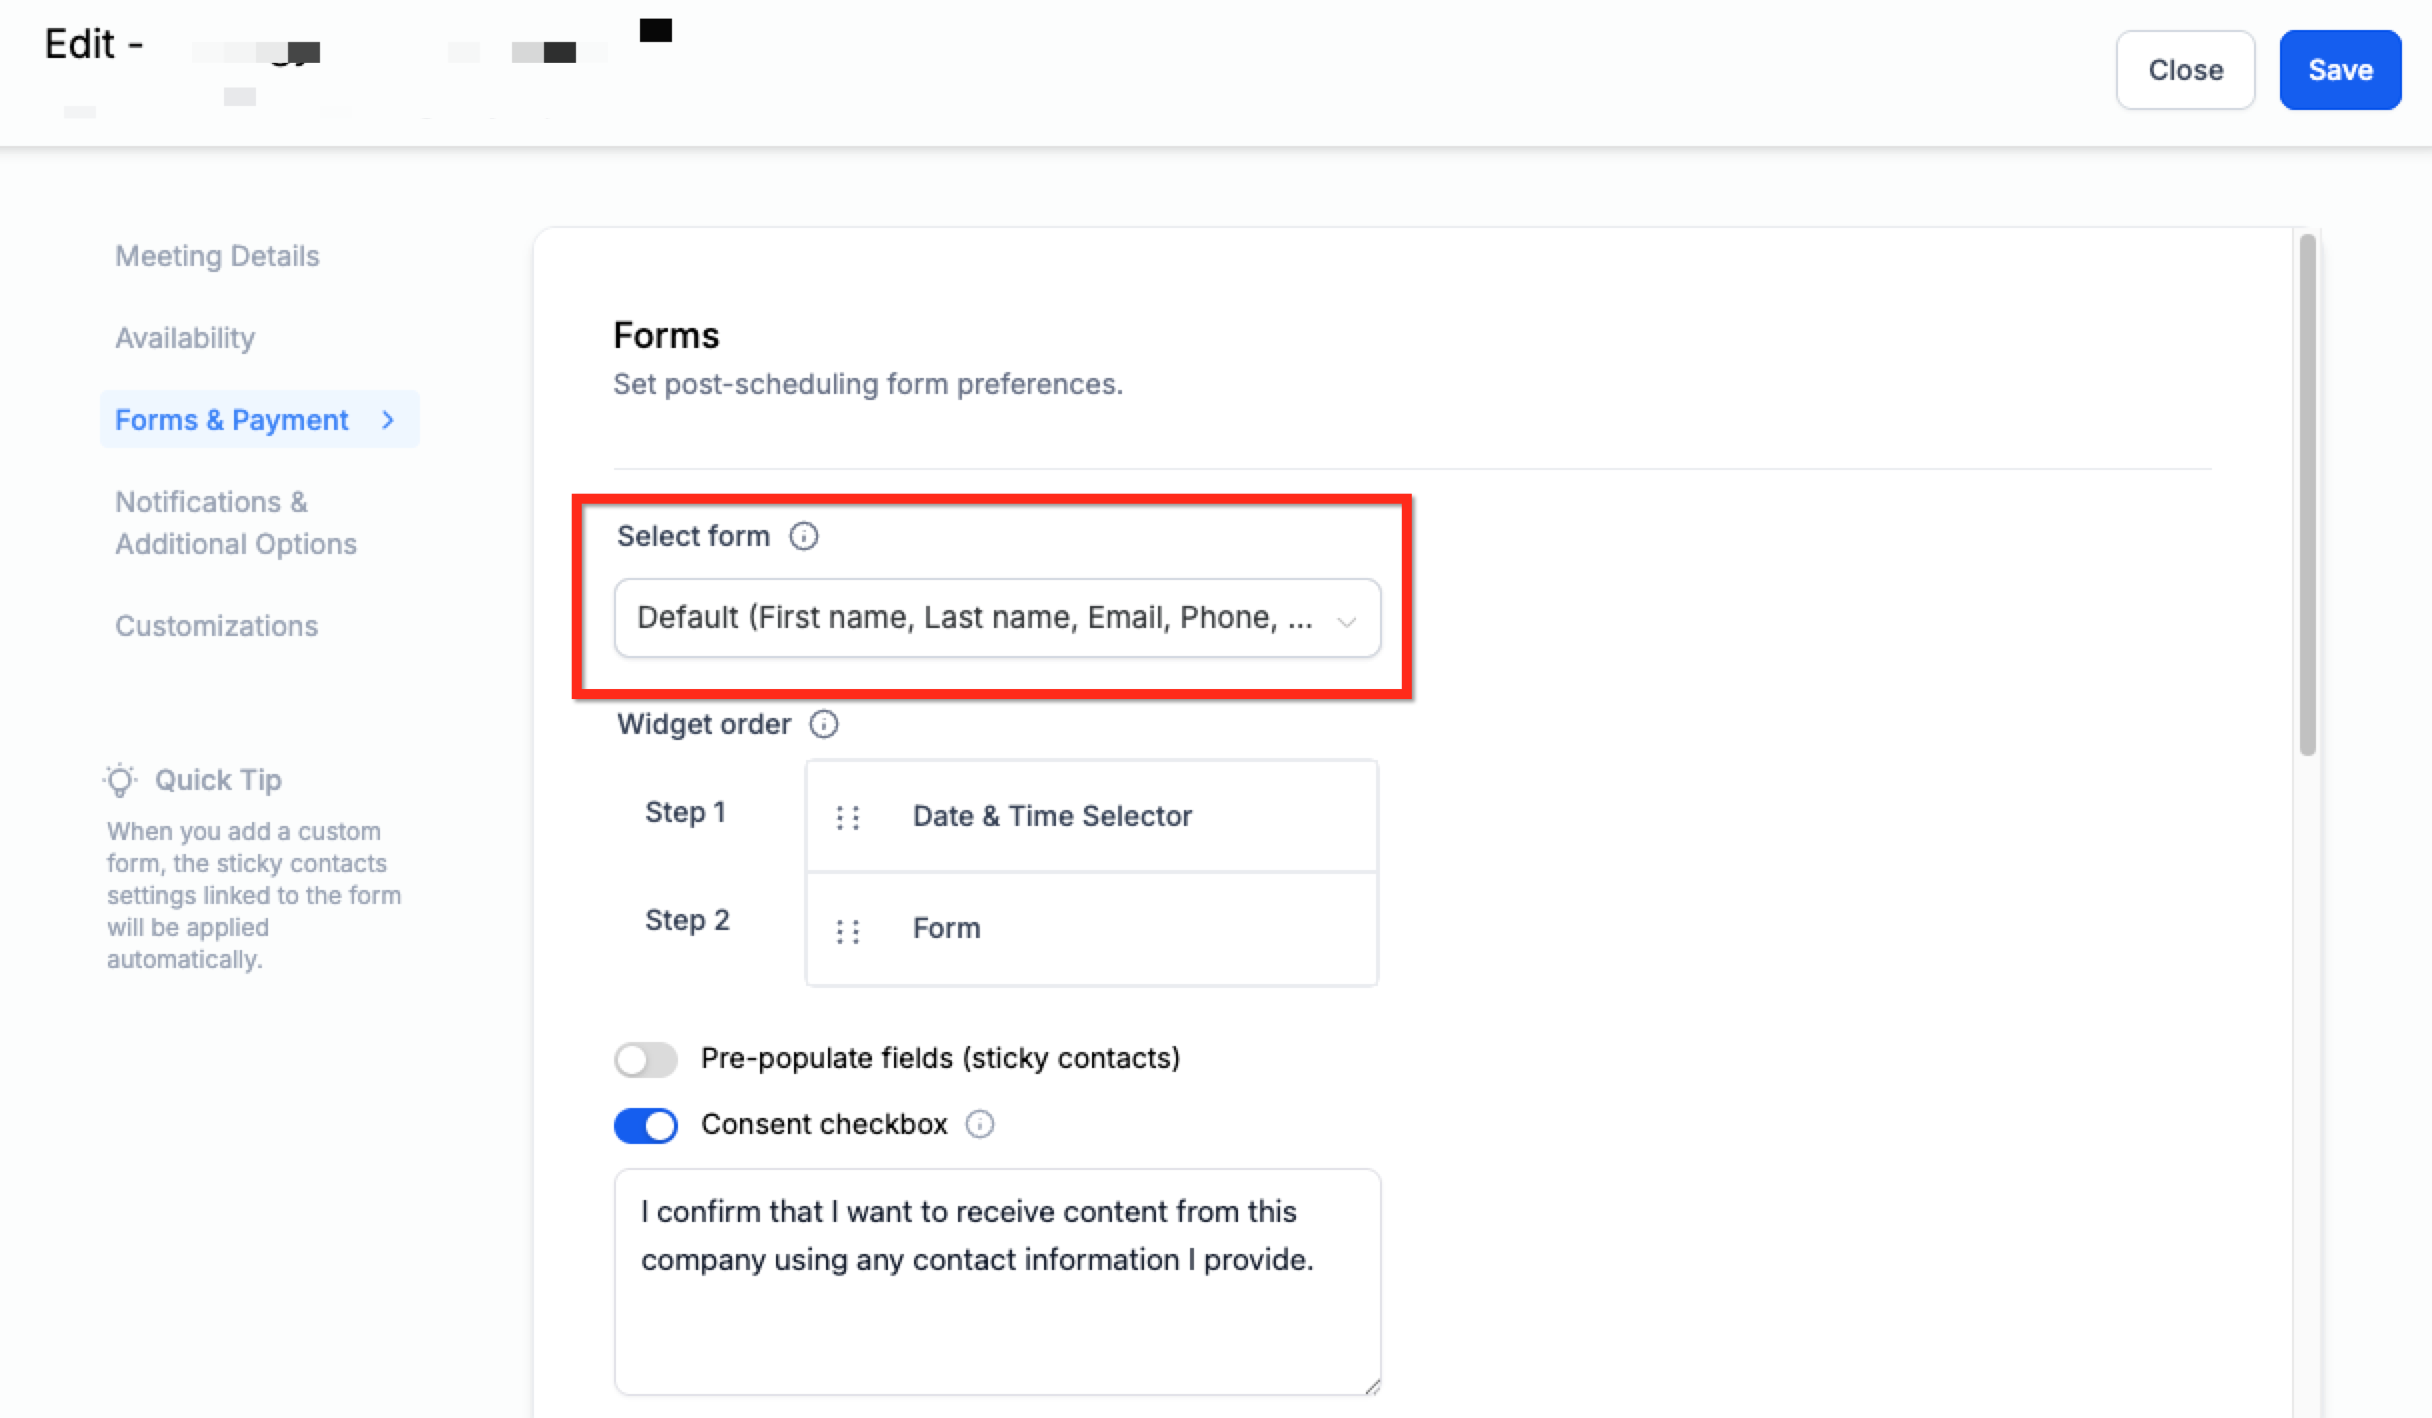
Step 2: Attach the Custom Form to Your Calendar
Section titled “Step 2: Attach the Custom Form to Your Calendar”- Open the Forms & Payment tab
- Under Select Form, choose the form you want to use
- Click Save
How to Add the Same Form in Multiple Calendars
Section titled “How to Add the Same Form in Multiple Calendars”If the same intake form is needed across several calendars, you can reuse it.
- After creating the form under Sites > Forms, assign it to each calendar individually
- Repeat the same setup steps for every calendar:
- Open Calendar Settings
- Click Edit
- Choose the form from the Select Form dropdown
Important Note
Section titled “Important Note”Forms must be added manually to each calendar. They are not automatically applied across multiple calendars.
This gives you control over which form is shown in each booking flow.
Frequently Asked Questions
Section titled “Frequently Asked Questions”Q: Can I use more than one custom form on a single calendar?
A: No. Only one custom form can be attached to a calendar at a time.
Q: What happens to the data submitted in the form?
A: The submitted data is stored in the contact’s record, provided the form fields are mapped correctly.
Q: Can I use the same form on multiple calendars?
A: Yes. The same form can be selected in multiple calendar settings.