
Creating Rooms
Rooms help you manage physical spaces and scheduling resources more effectively. They can be linked to service calendars so appointments are assigned correctly and overlapping bookings are avoided.
Table of Contents
Section titled “Table of Contents”- What is a Room?
- Key Benefits of Rooms
- How to Set Up Rooms
- Editing or Deleting a Room
- Frequently Asked Questions
What is a Room?
Section titled “What is a Room?”A Room is a schedulable resource used to manage availability and resource allocation within service calendars. Whether you are managing consultation spaces, therapy rooms, service bays, or event areas, Rooms help ensure appointments are assigned properly and the same space is not booked more than intended.
Rooms can also work alongside calendars, users, and availability settings, which makes them useful for appointment-based businesses that need better scheduling control.
Key Benefits of Rooms
Section titled “Key Benefits of Rooms”Using Rooms helps improve scheduling accuracy and reduces conflicts across your booking system.
- Helps prevent overlapping bookings by linking Rooms to calendars
- Supports resource planning across services and physical spaces
- Works with availability settings to control when bookings can happen
- Allows better scheduling organization for teams and locations
- Improves booking workflows for businesses that depend on appointment availability
How to Set Up Rooms
Section titled “How to Set Up Rooms”Creating Rooms helps align your service calendar availability with actual spaces or resources, making scheduling more accurate and easier to manage.
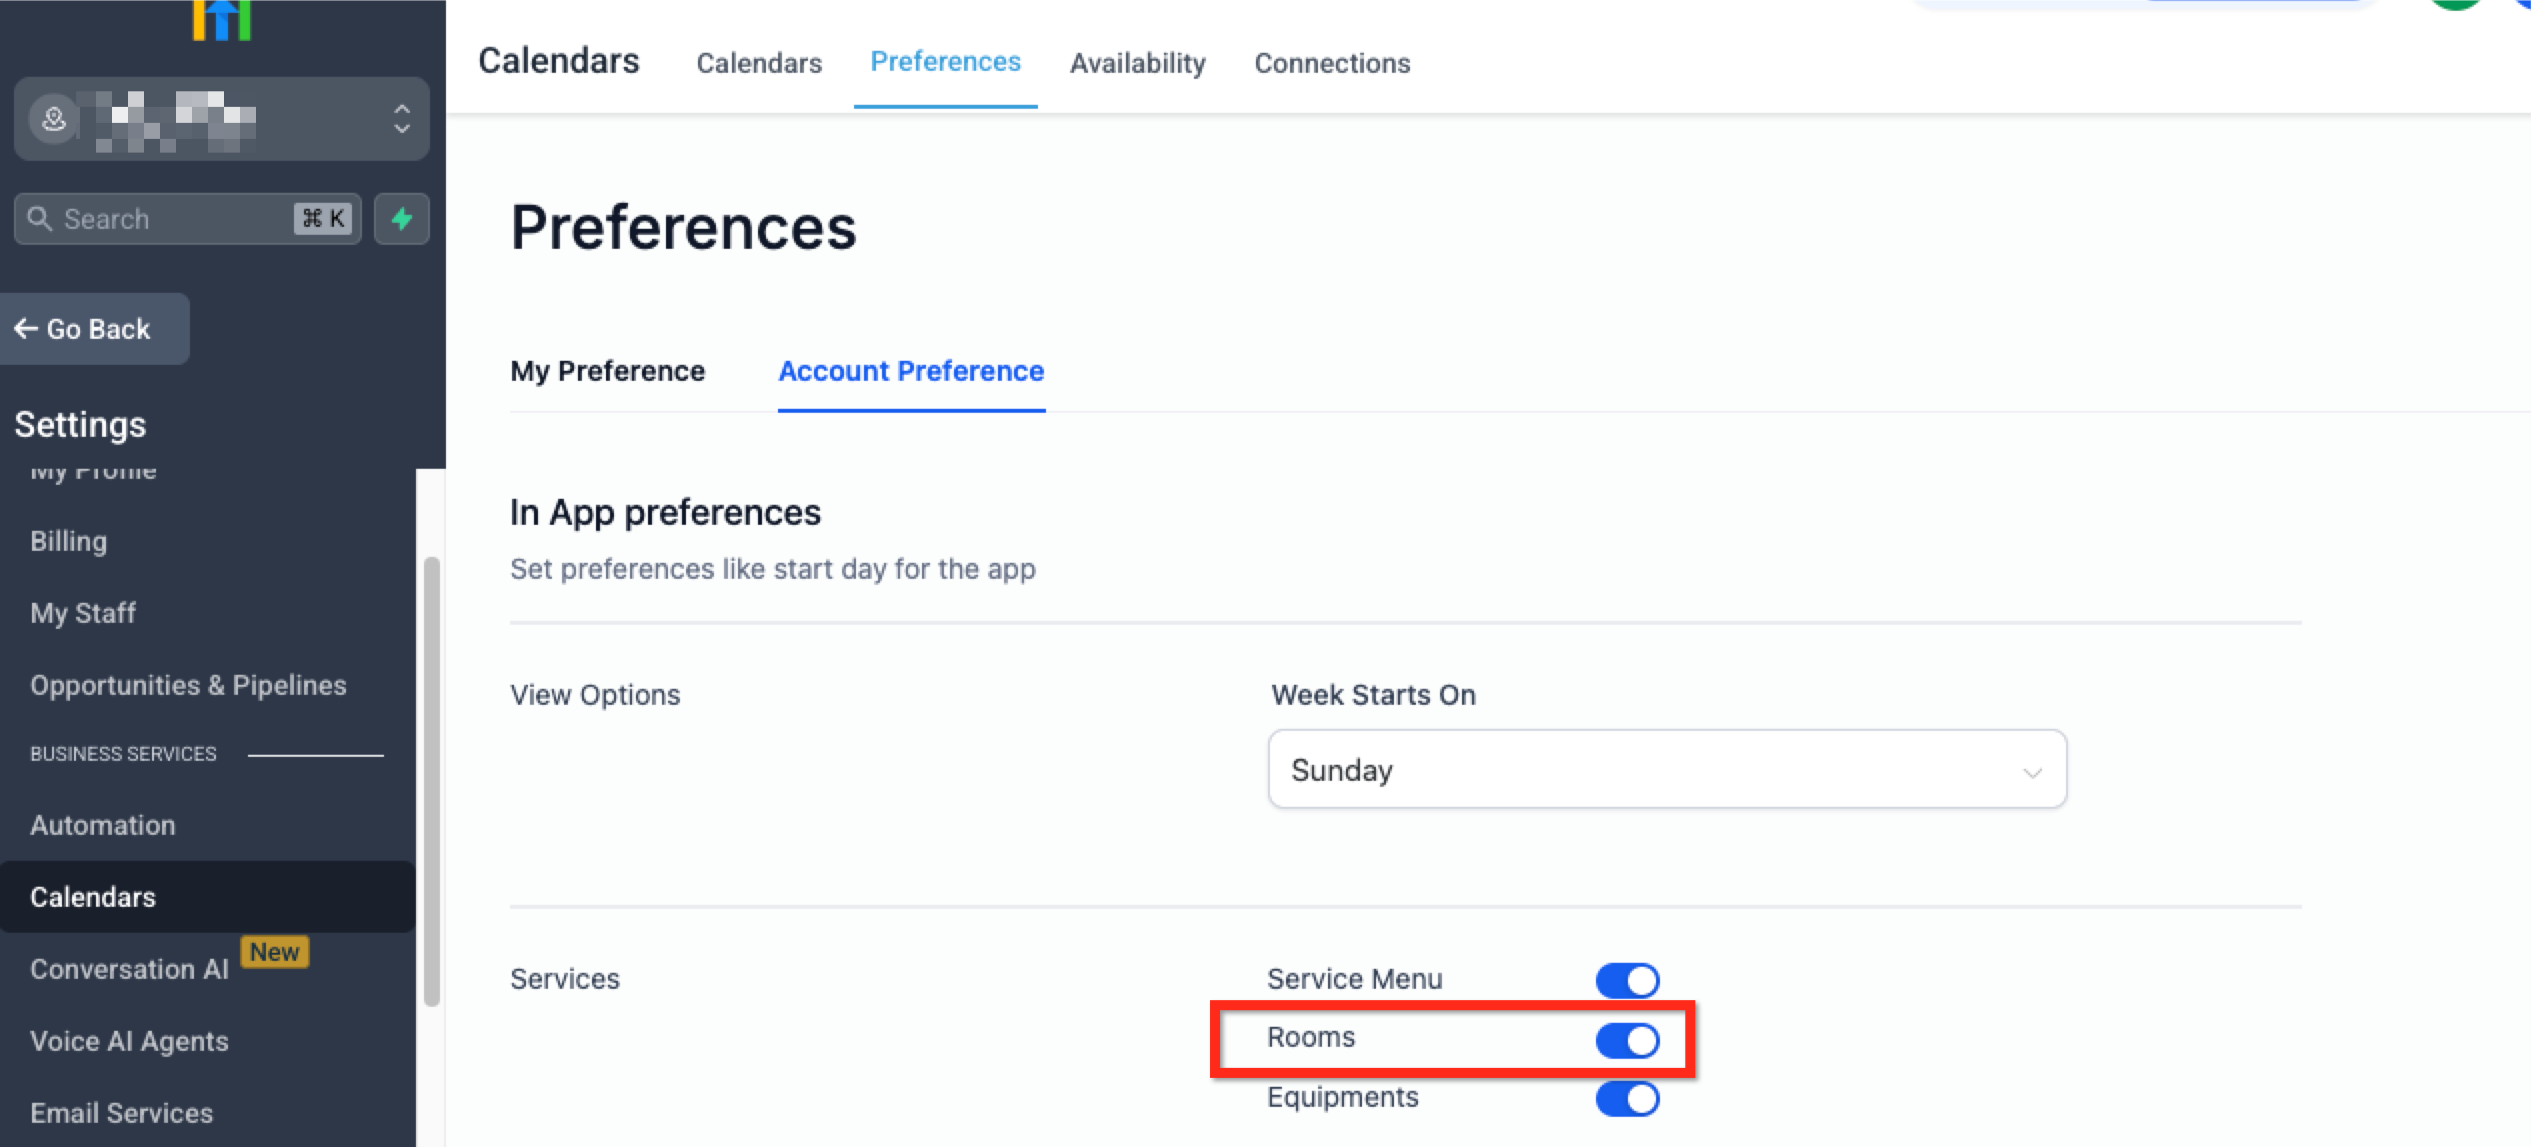
Step 1: Enable Rooms
Section titled “Step 1: Enable Rooms”To start using Rooms, first enable the setting in Calendar preferences.
- Go to Settings > Calendar Settings
- Open the Preferences tab
- Select the Account Preference section
- In the Services area, turn on the Rooms toggle
- Click Save Preferences
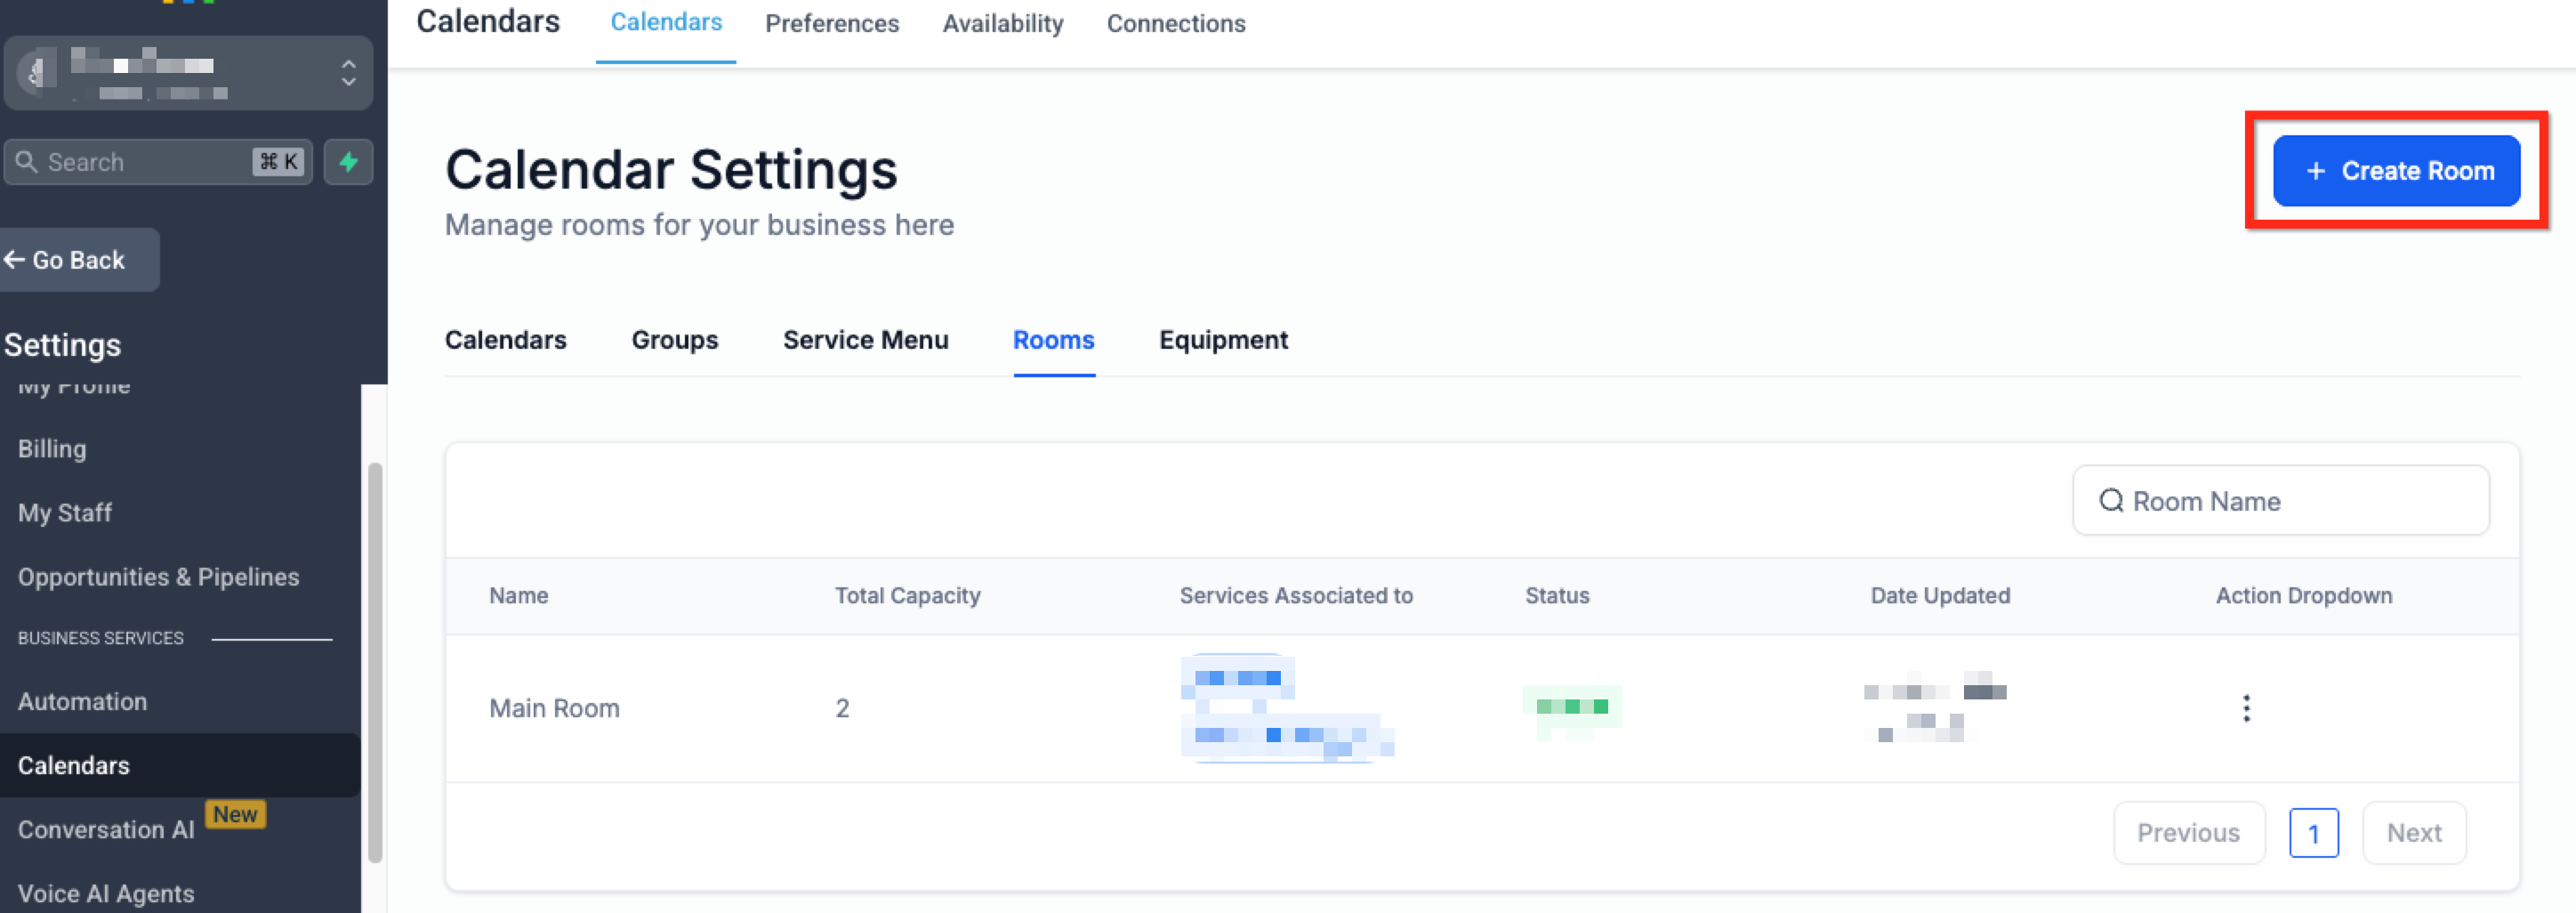
Step 2: Create a Room
Section titled “Step 2: Create a Room”Once Rooms are enabled, you can create a new Room from Calendar Settings.
- Return to the Calendars tab inside Calendar Settings
- Open the Rooms tab
- Click + Create Room in the top-right corner
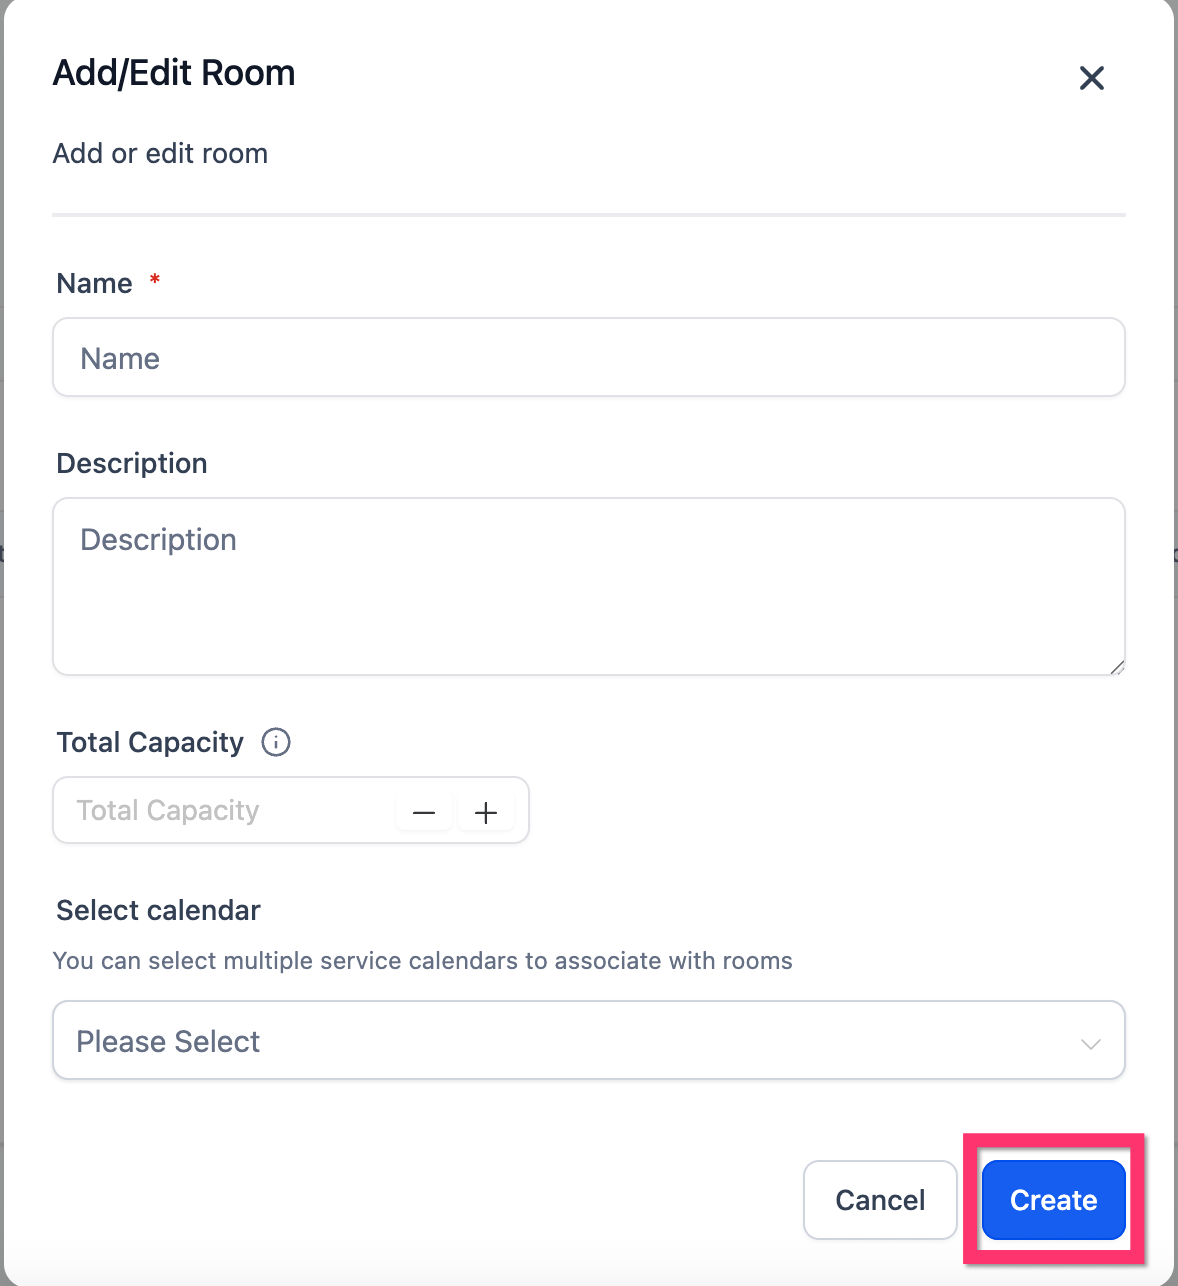
Step 3: Provide Room Details
Section titled “Step 3: Provide Room Details”Complete the Room details before saving it.
- Name: Enter a clear name for the room so it is easy to identify
- Description: Add notes or context about how the room is used
- Total Capacity: Set the maximum number of appointments that can be scheduled in the room at the same time
- Select Calendar: Choose the calendar or calendars that should use this room
After entering the details, click Create.
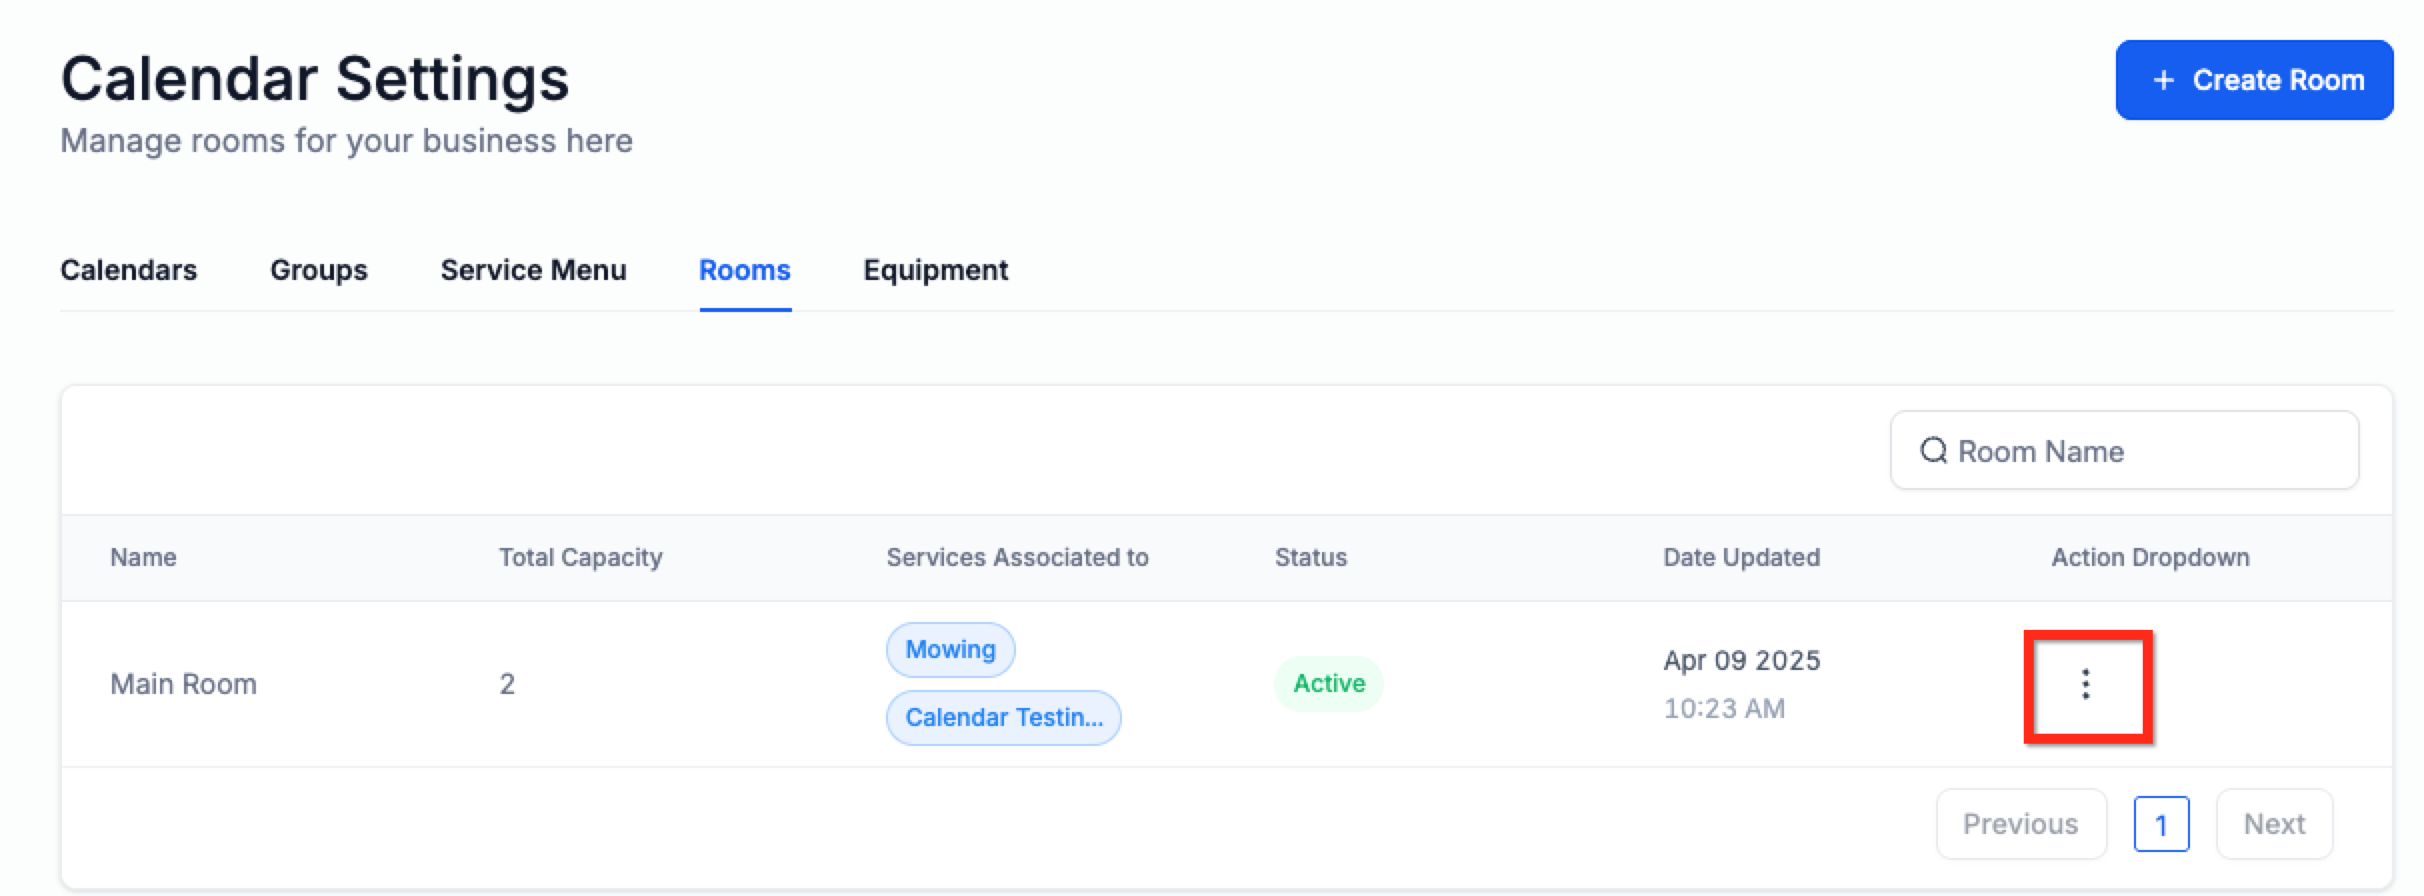
Editing or Deleting a Room
Section titled “Editing or Deleting a Room”Keeping your Room list updated helps avoid scheduling confusion and ensures only active spaces are being used in booking flows.
To edit or remove an existing Room:
- Go to Settings > Calendar Settings
- Open the Rooms tab
- Click the three-dot menu next to the Room
- Select Edit to update the Room details, or Delete to remove it
- If editing, make your changes and click Save
Frequently Asked Questions
Section titled “Frequently Asked Questions”Q: Can the same Room be assigned to multiple calendars?
A: Yes, but availability should be managed carefully so bookings do not conflict.
Q: Can clients see or access Rooms directly?
A: No. Rooms are used internally for scheduling and resource management.
Q: What happens if a Room is not linked to a calendar?
A: It will not be included in booking logic, which can lead to scheduling conflicts.
Q: Can I rename a Room after creating it?
A: Yes. You can update the Room name at any time from the edit option.
Q: Is there a limit to how many Rooms I can create?
A: There is no stated fixed limit, but it is best to keep Room names and assignments well organized.