
Adding Contact Tags to Multiple Contacts
Adding tags in bulk allows you to label and organize large sets of contacts efficiently without editing each record manually. Tags help categorize contacts based on shared traits, behaviors, or stages in the customer journey. This bulk feature is essential for rapidly segmenting audiences, triggering automations, and managing overarching CRM workflows at scale.
Key Benefits of Adding Tags to Multiple Contacts
Section titled “Key Benefits of Adding Tags to Multiple Contacts”Bulk tagging is a powerful CRM operation that can streamline segmentation, personalization, and automation setup. Here are key advantages:
- Save time: Tag dozens or hundreds of contacts in one single action.
- Improve segmentation: Rapidly group audiences for more targeted communications.
- Trigger workflows: Intelligently launch campaigns based on tag-based entry conditions.
- Track campaign membership: Monitor user progress through complex funnels with ease.
- Maintain clean records: Keep organized contact tiers without manual entry.
- Enhance reporting: Group relevant contacts together for holistic analytics.
Setting Up Add Contact Tag Bulk Operation
Section titled “Setting Up Add Contact Tag Bulk Operation”Follow this process to accurately apply tags to multiple contacts from the master Contacts page.
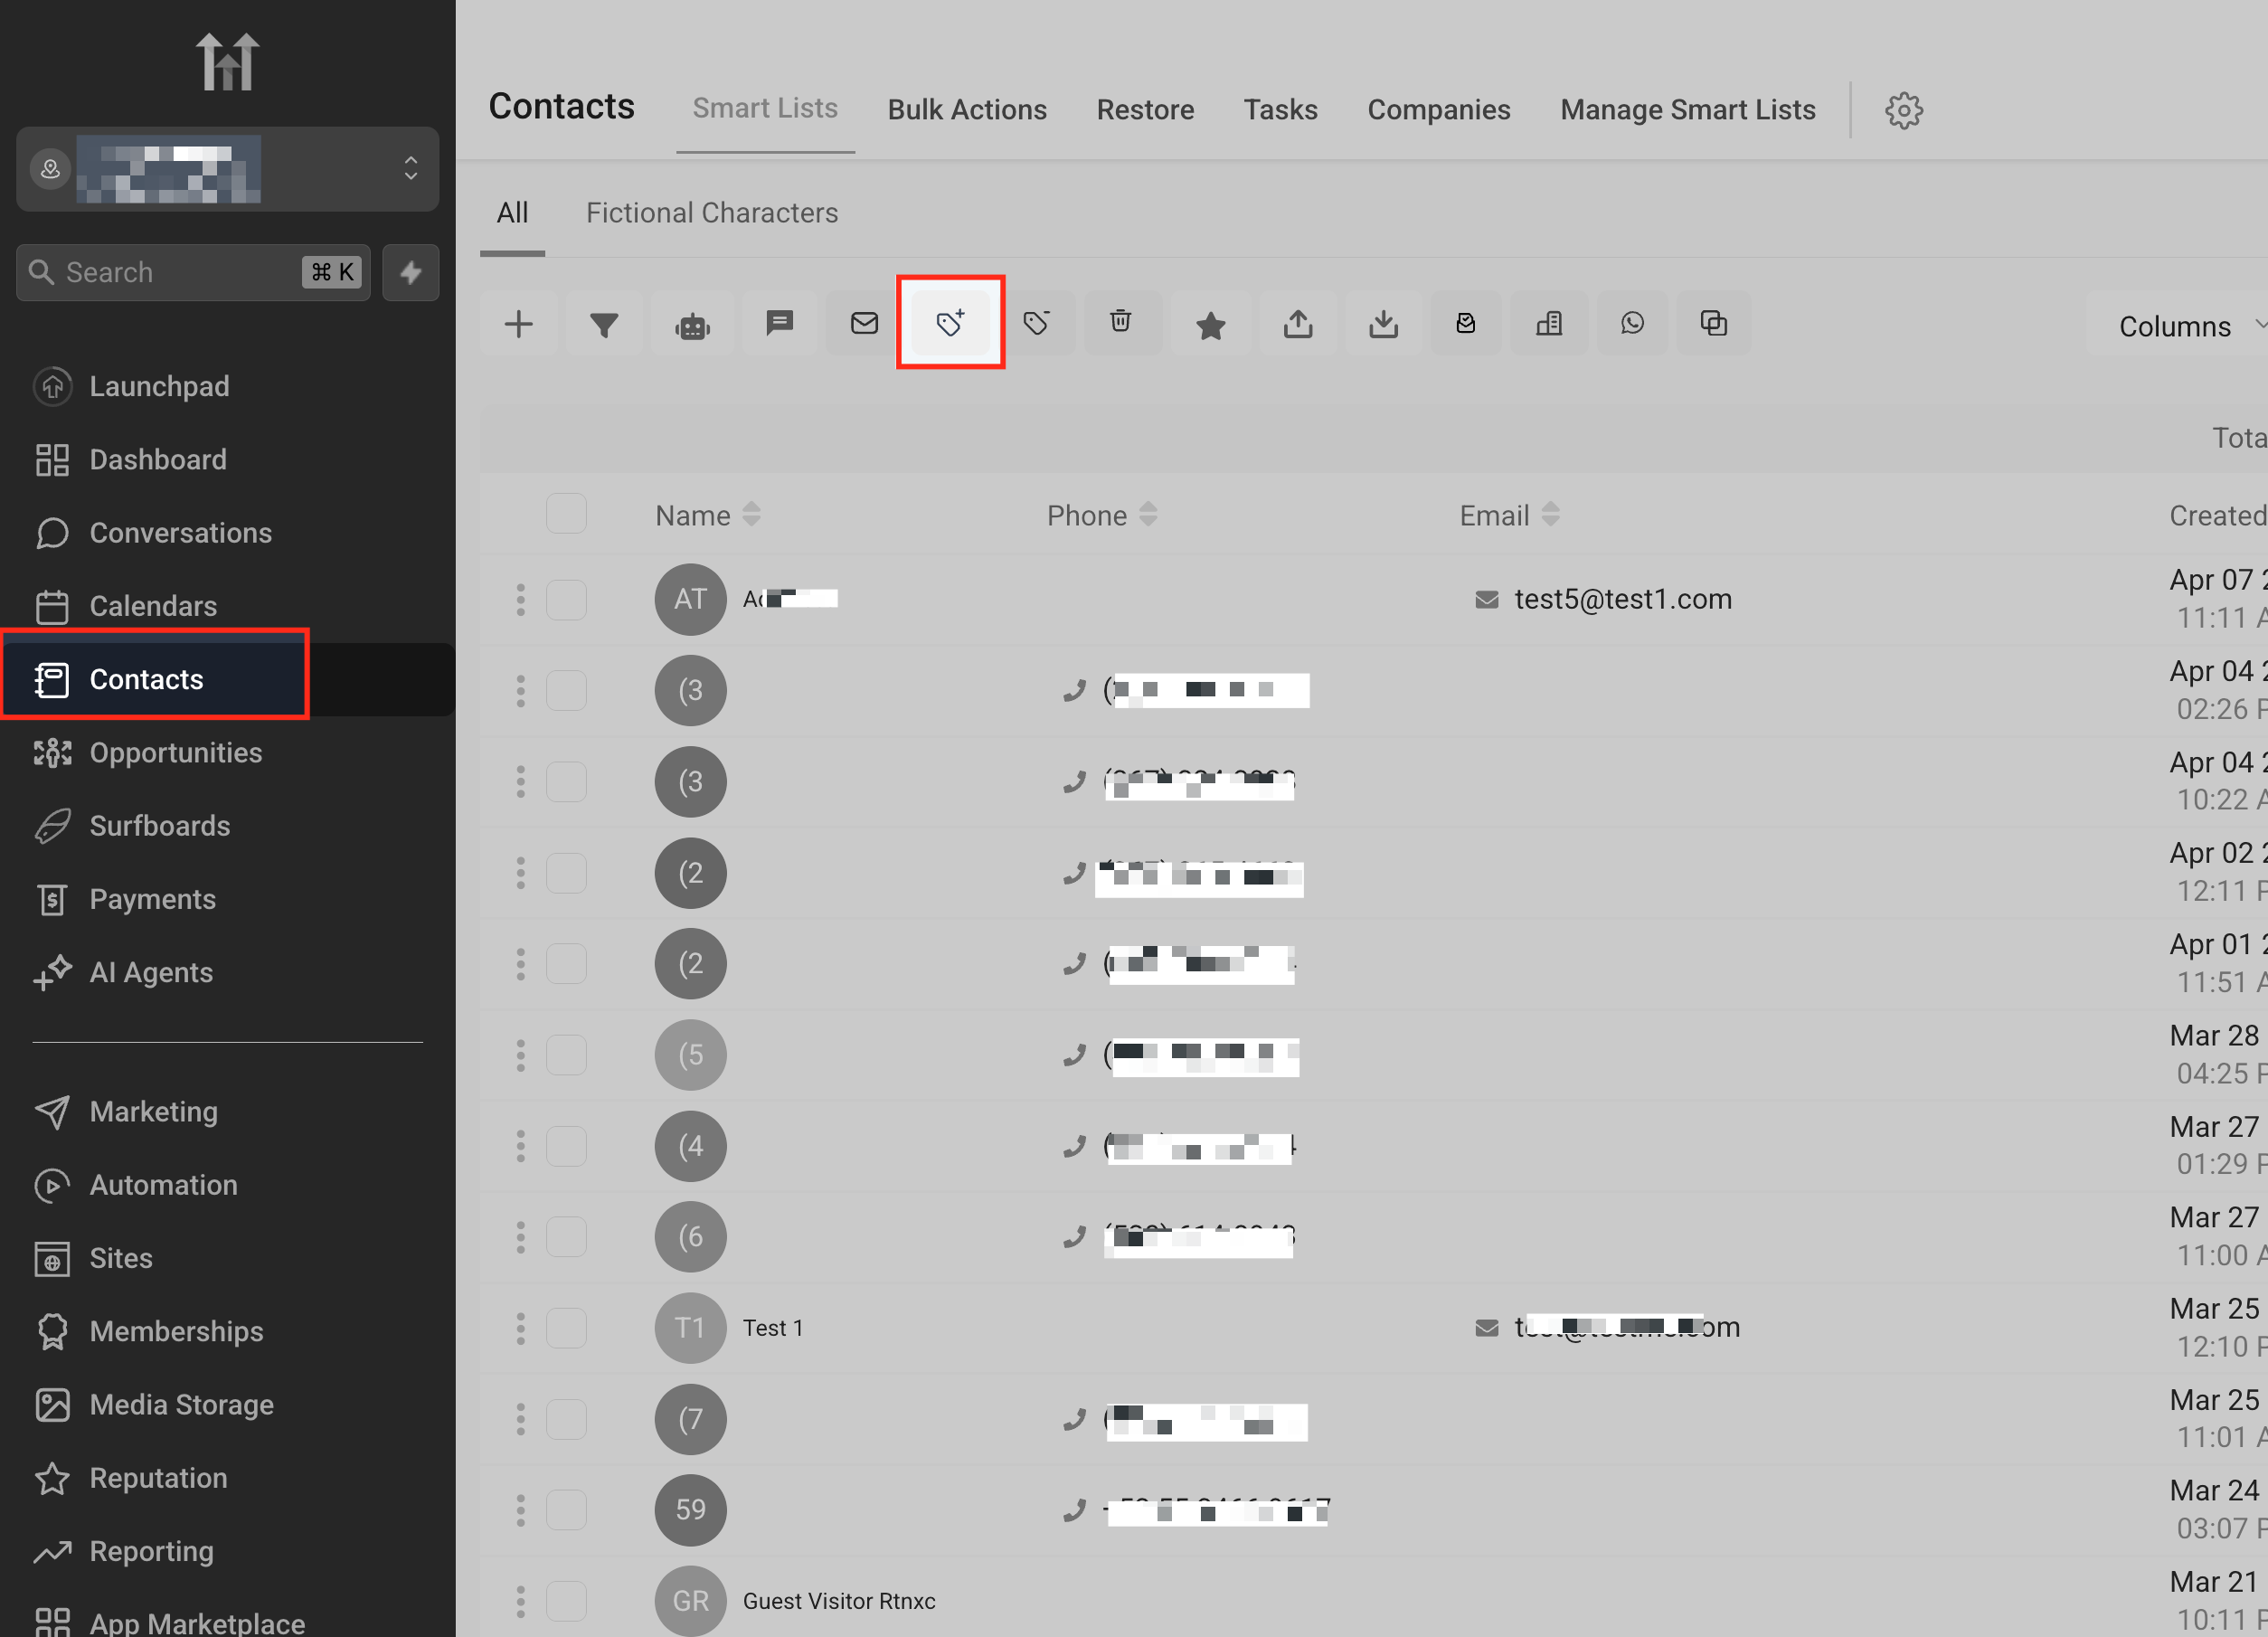
1. Navigate to the Contacts Tab
Section titled “1. Navigate to the Contacts Tab”From your dashboard, click on the Contacts tab in the left-hand navigation menu to open the master list.
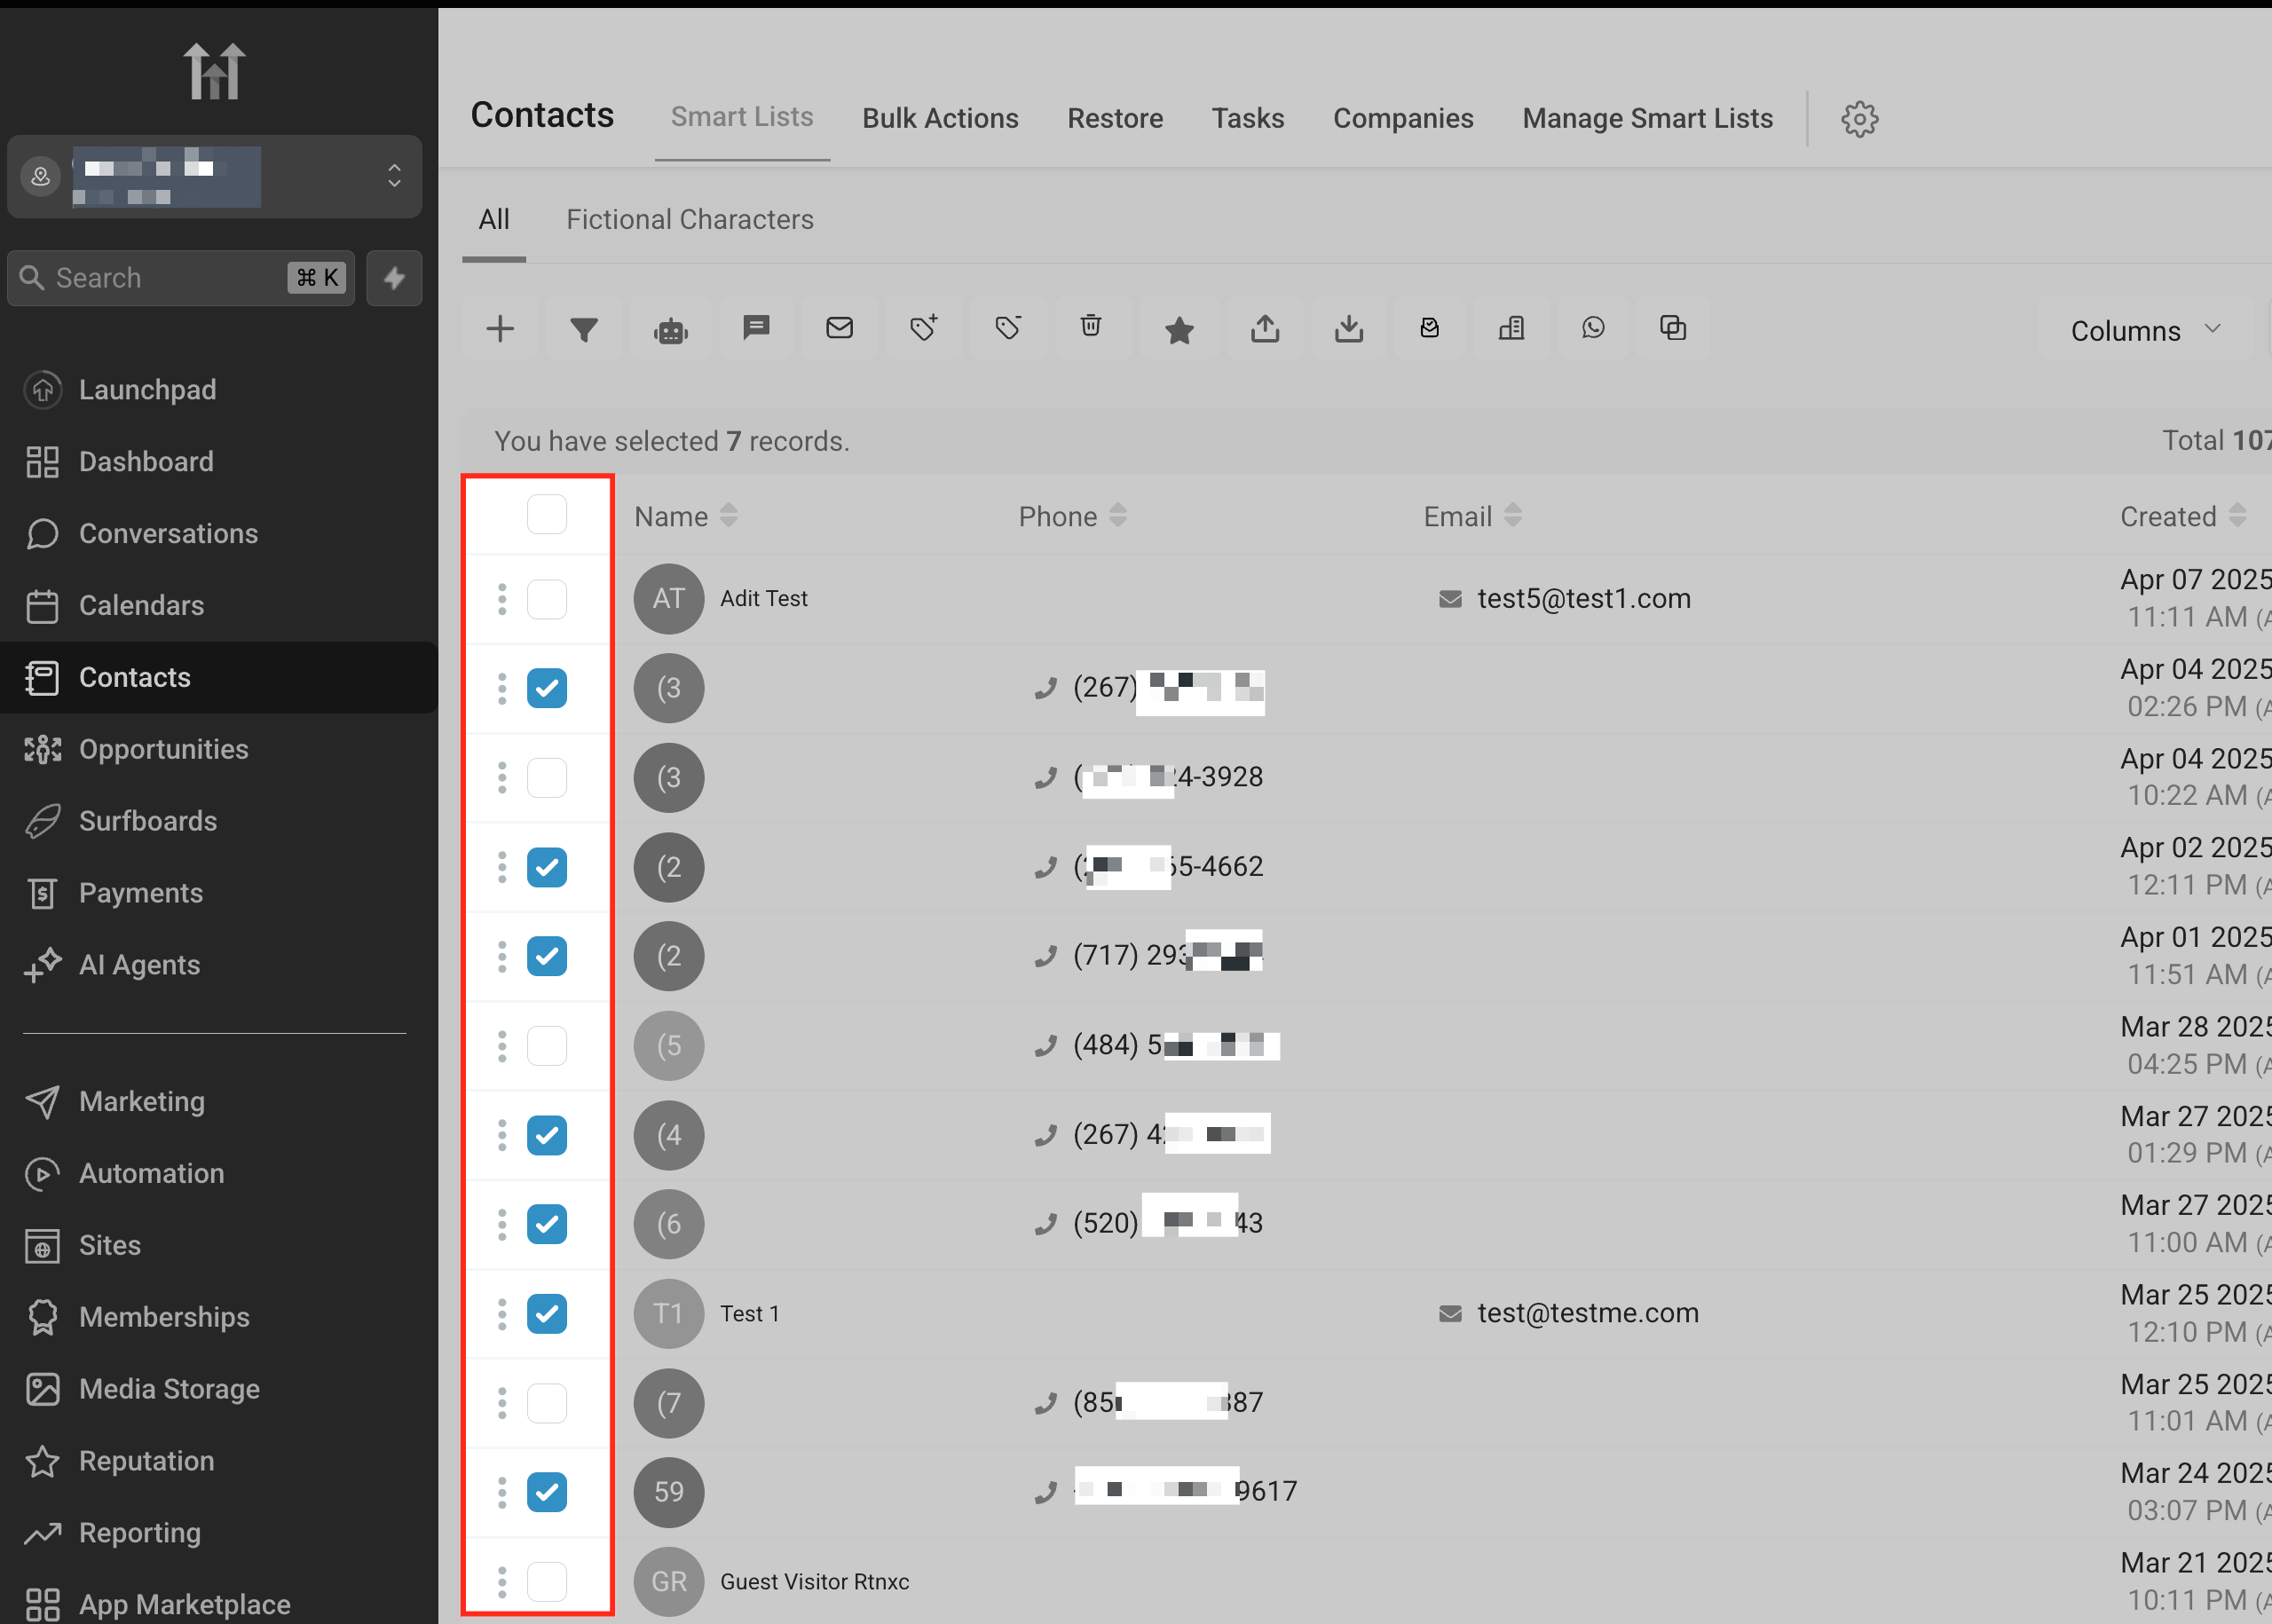
2. Select Multiple Contacts
Section titled “2. Select Multiple Contacts”Use the checkboxes on the left side of the table rows to select the specific contacts you want to tag. You can select individual rows, or use the master top-checkbox to select all loaded records.
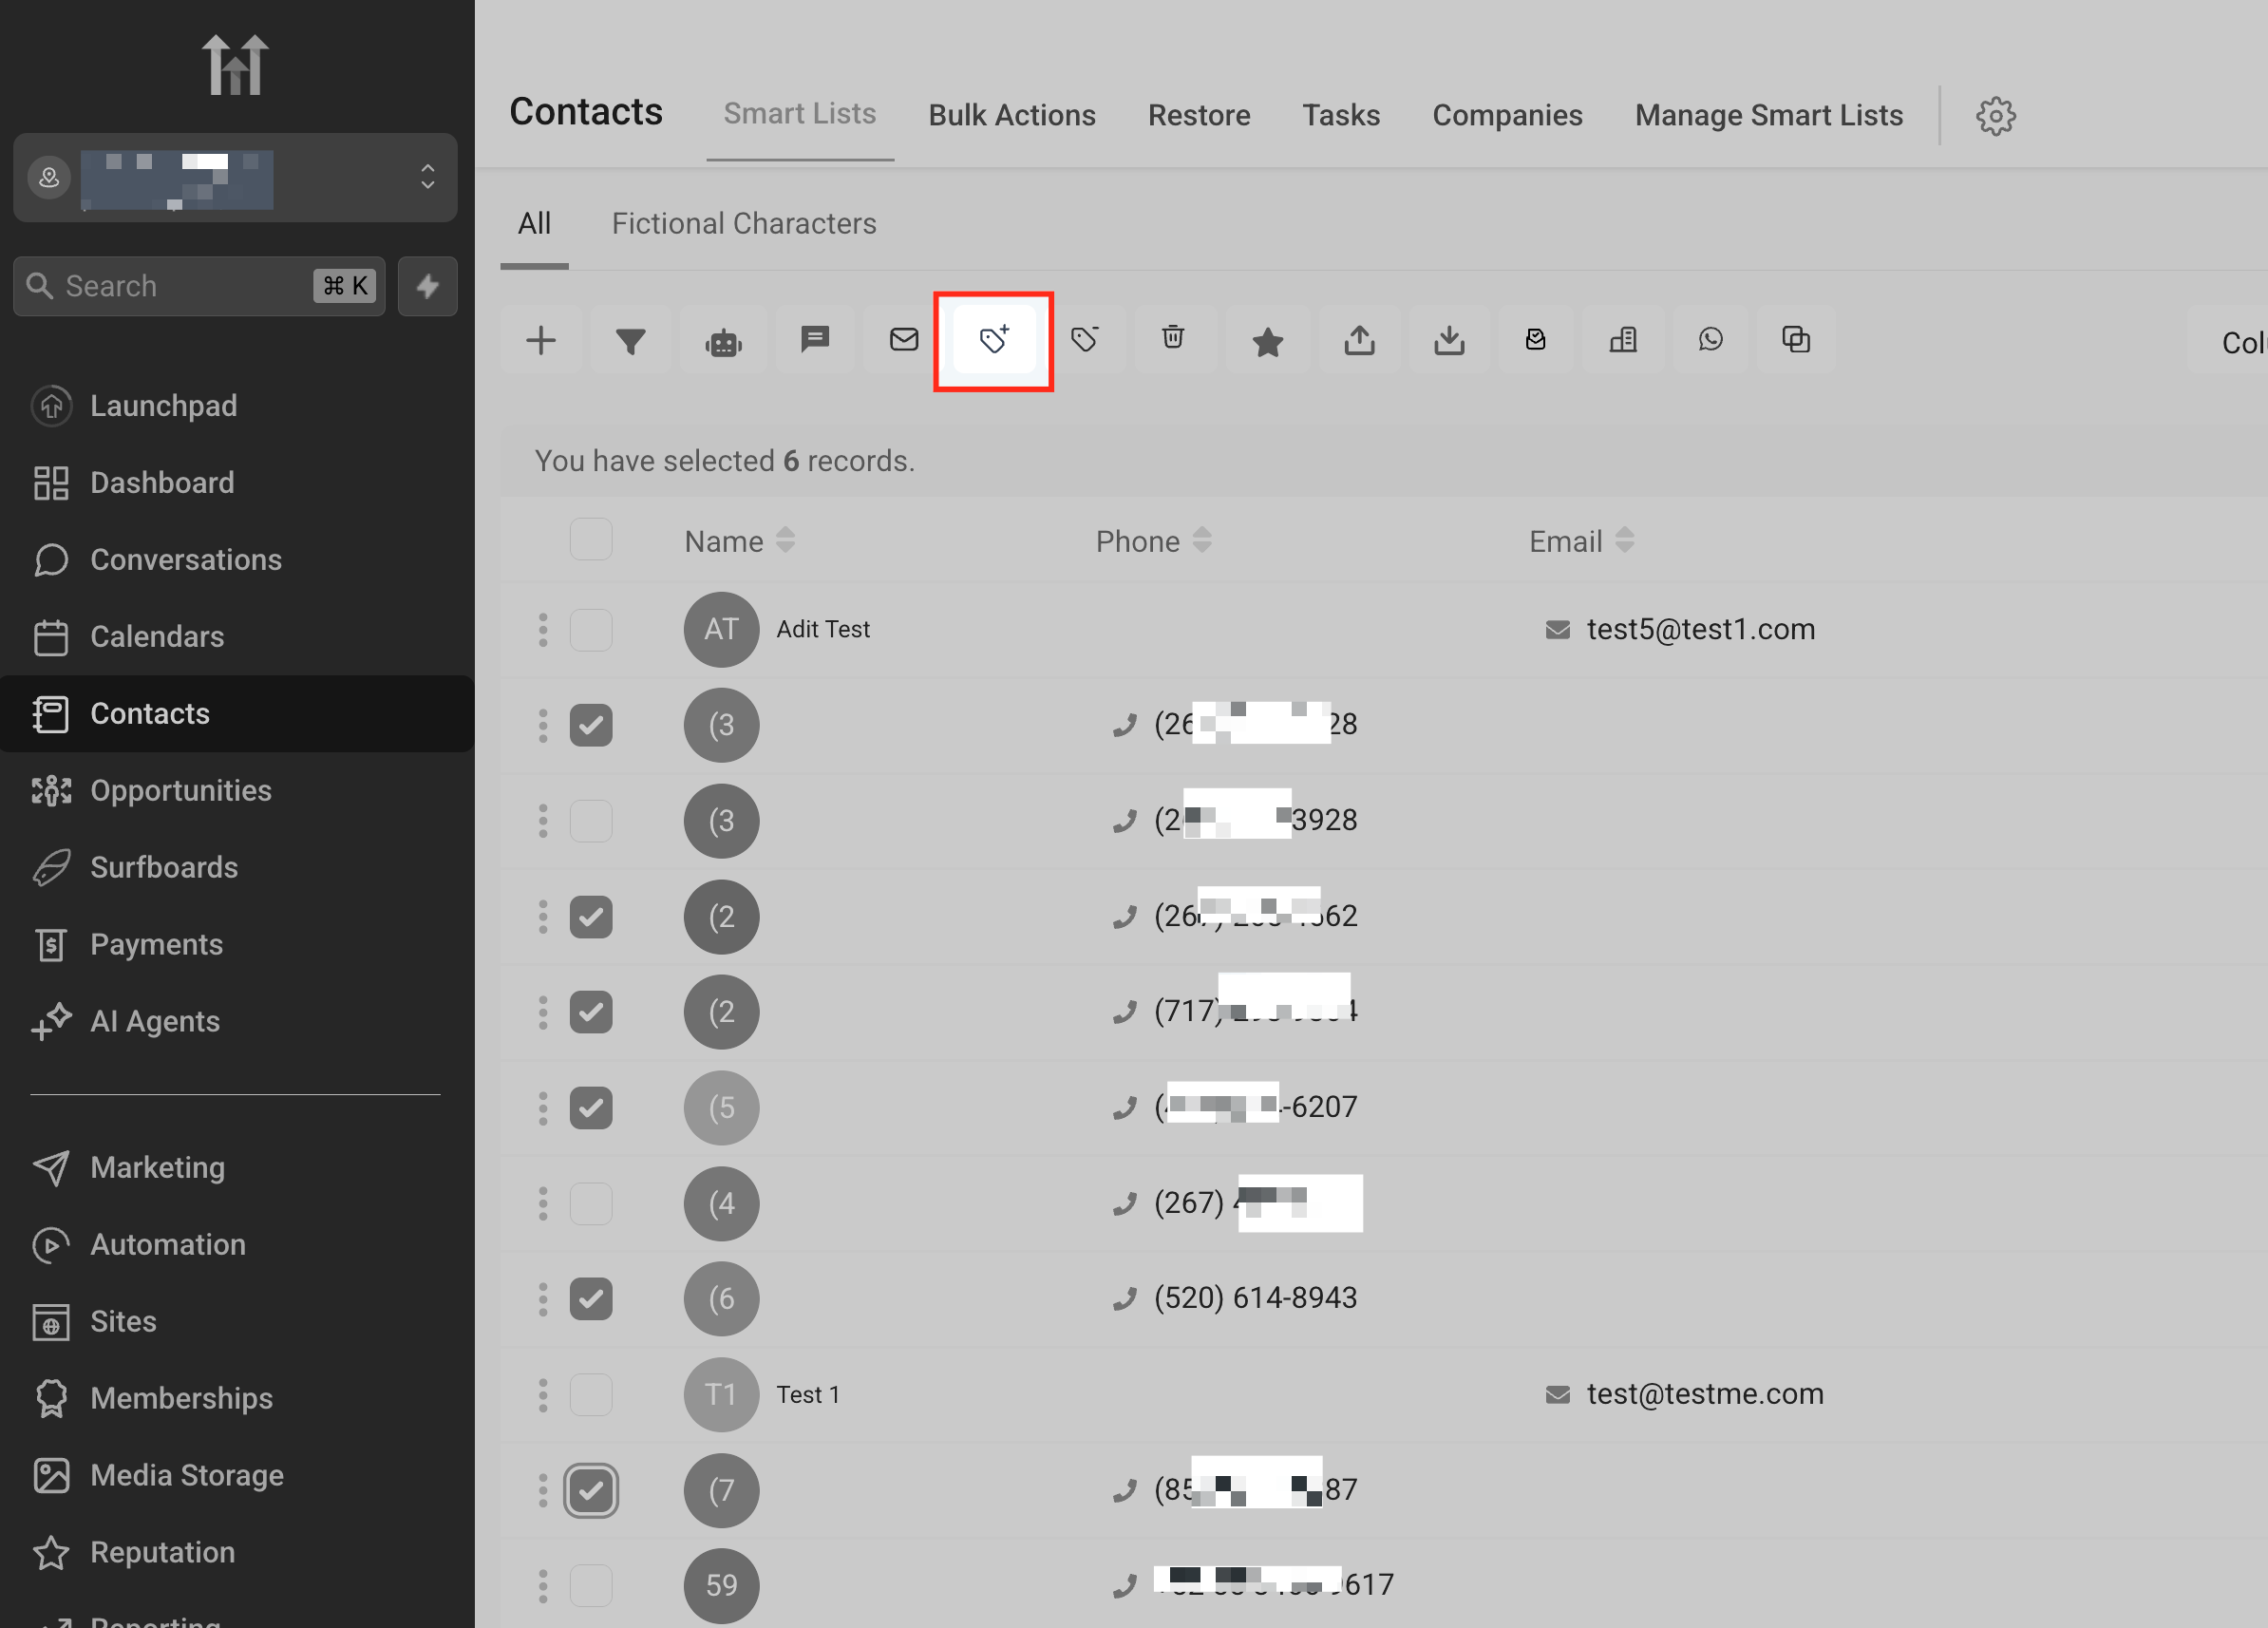
3. Click the “Add Tag” Icon
Section titled “3. Click the “Add Tag” Icon”Once your targeted contacts are selected, an action options bar will appear at the top of the screen. Click the Add Tag icon.
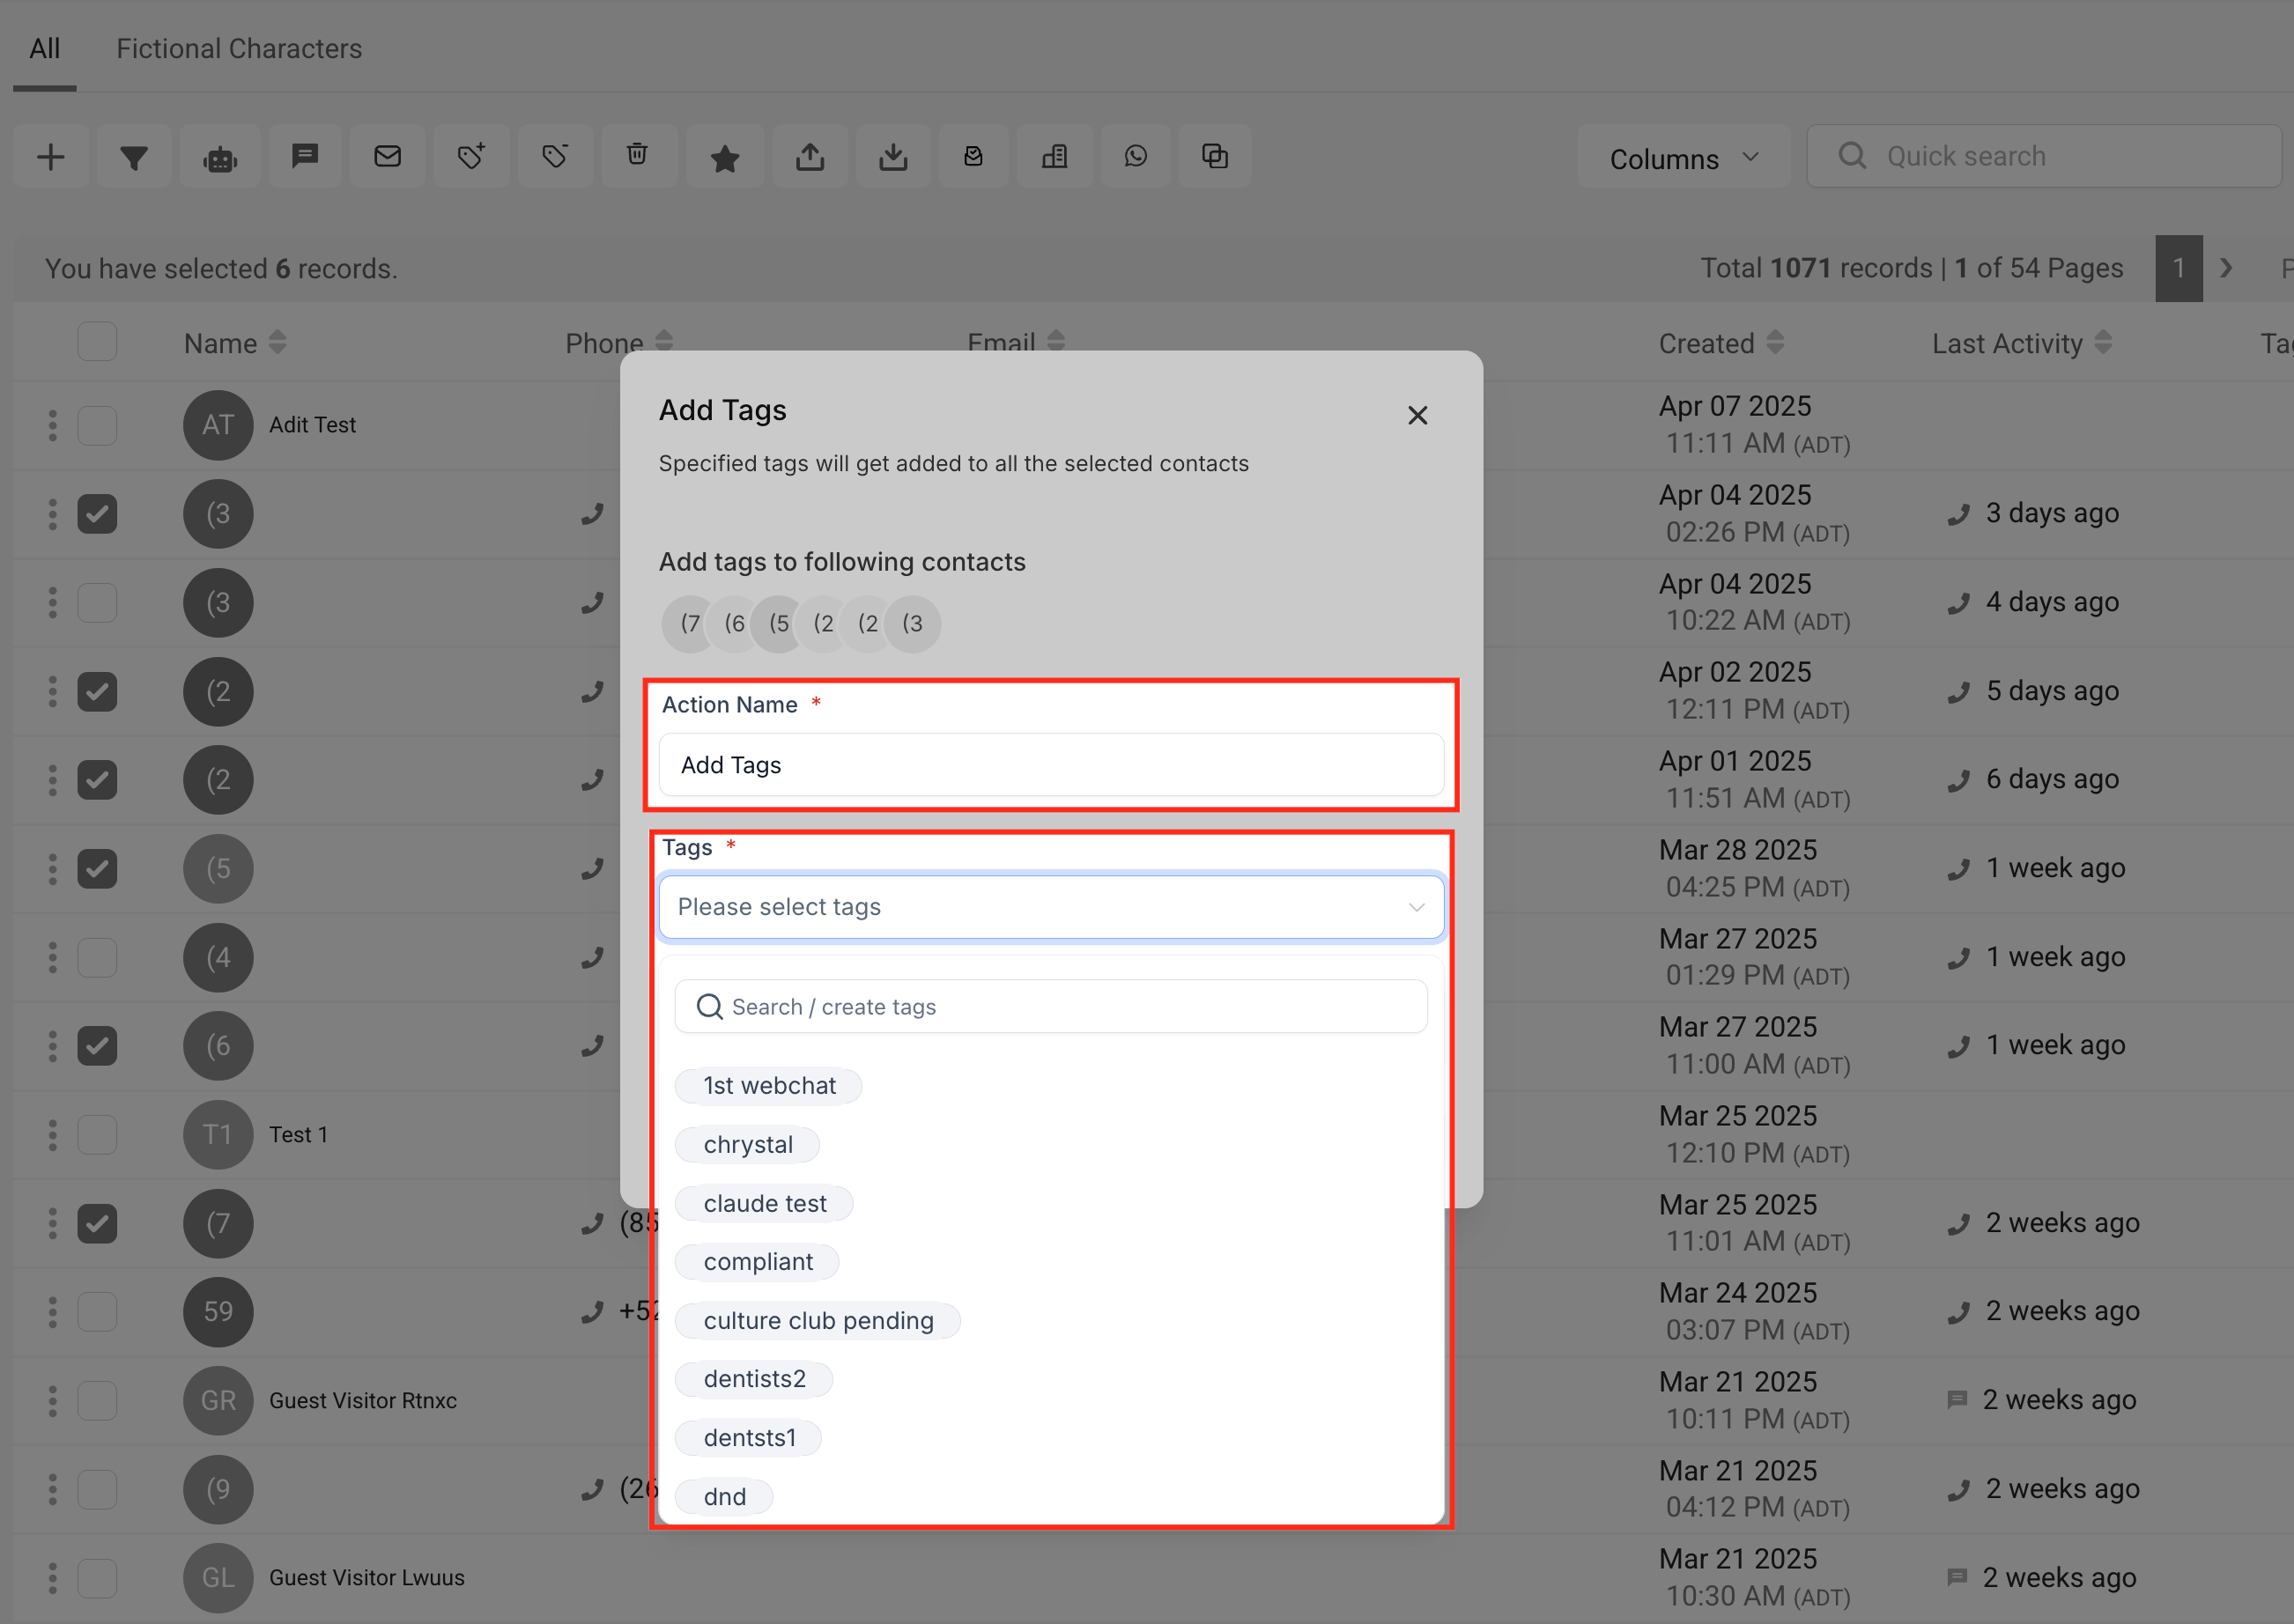
4. Add Action Name and Tags
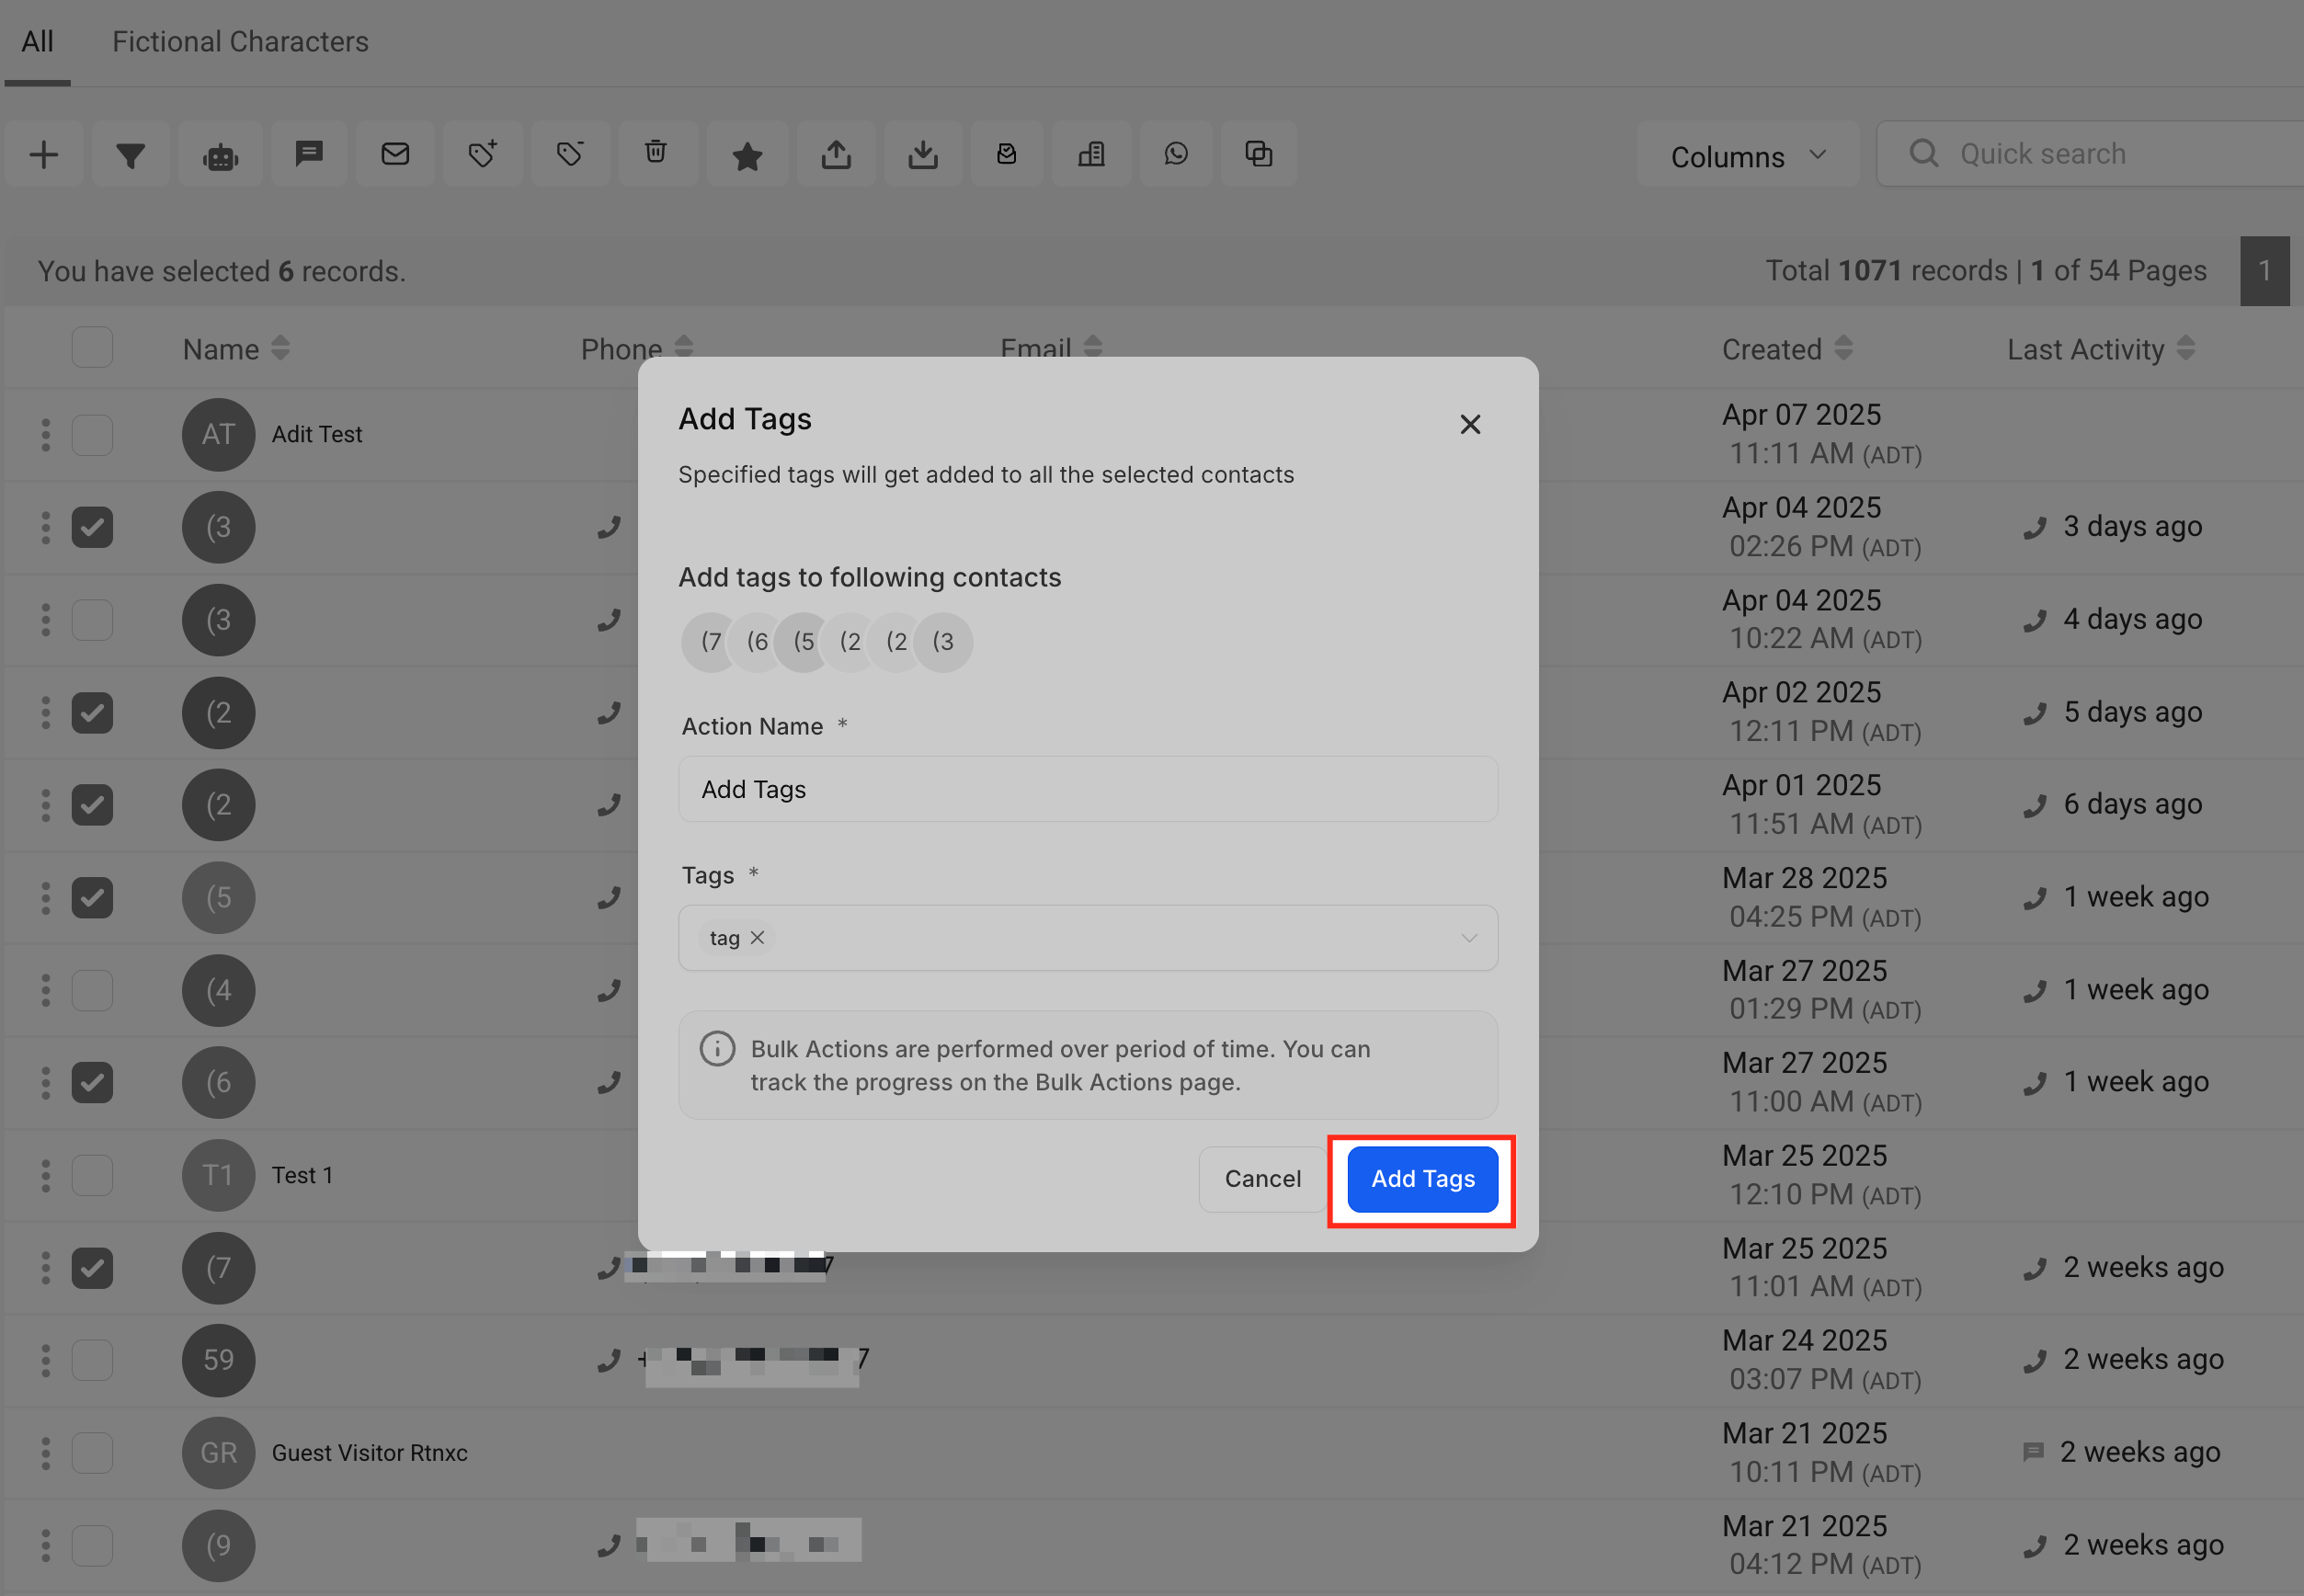
Section titled “4. Add Action Name and Tags”In the “Add Tags” modal window, give your specific bulk action a descriptive name under the Action Name field (this helps you find it in the audit logs later). Next, click the dropdown from the Tags field and select one or more tags from your system list.
5. Click “Add Tags” to Apply
Section titled “5. Click “Add Tags” to Apply”Once the action is named and tags are selected, click the Add Tags button to begin the asynchronous operation.
6. Track Progress
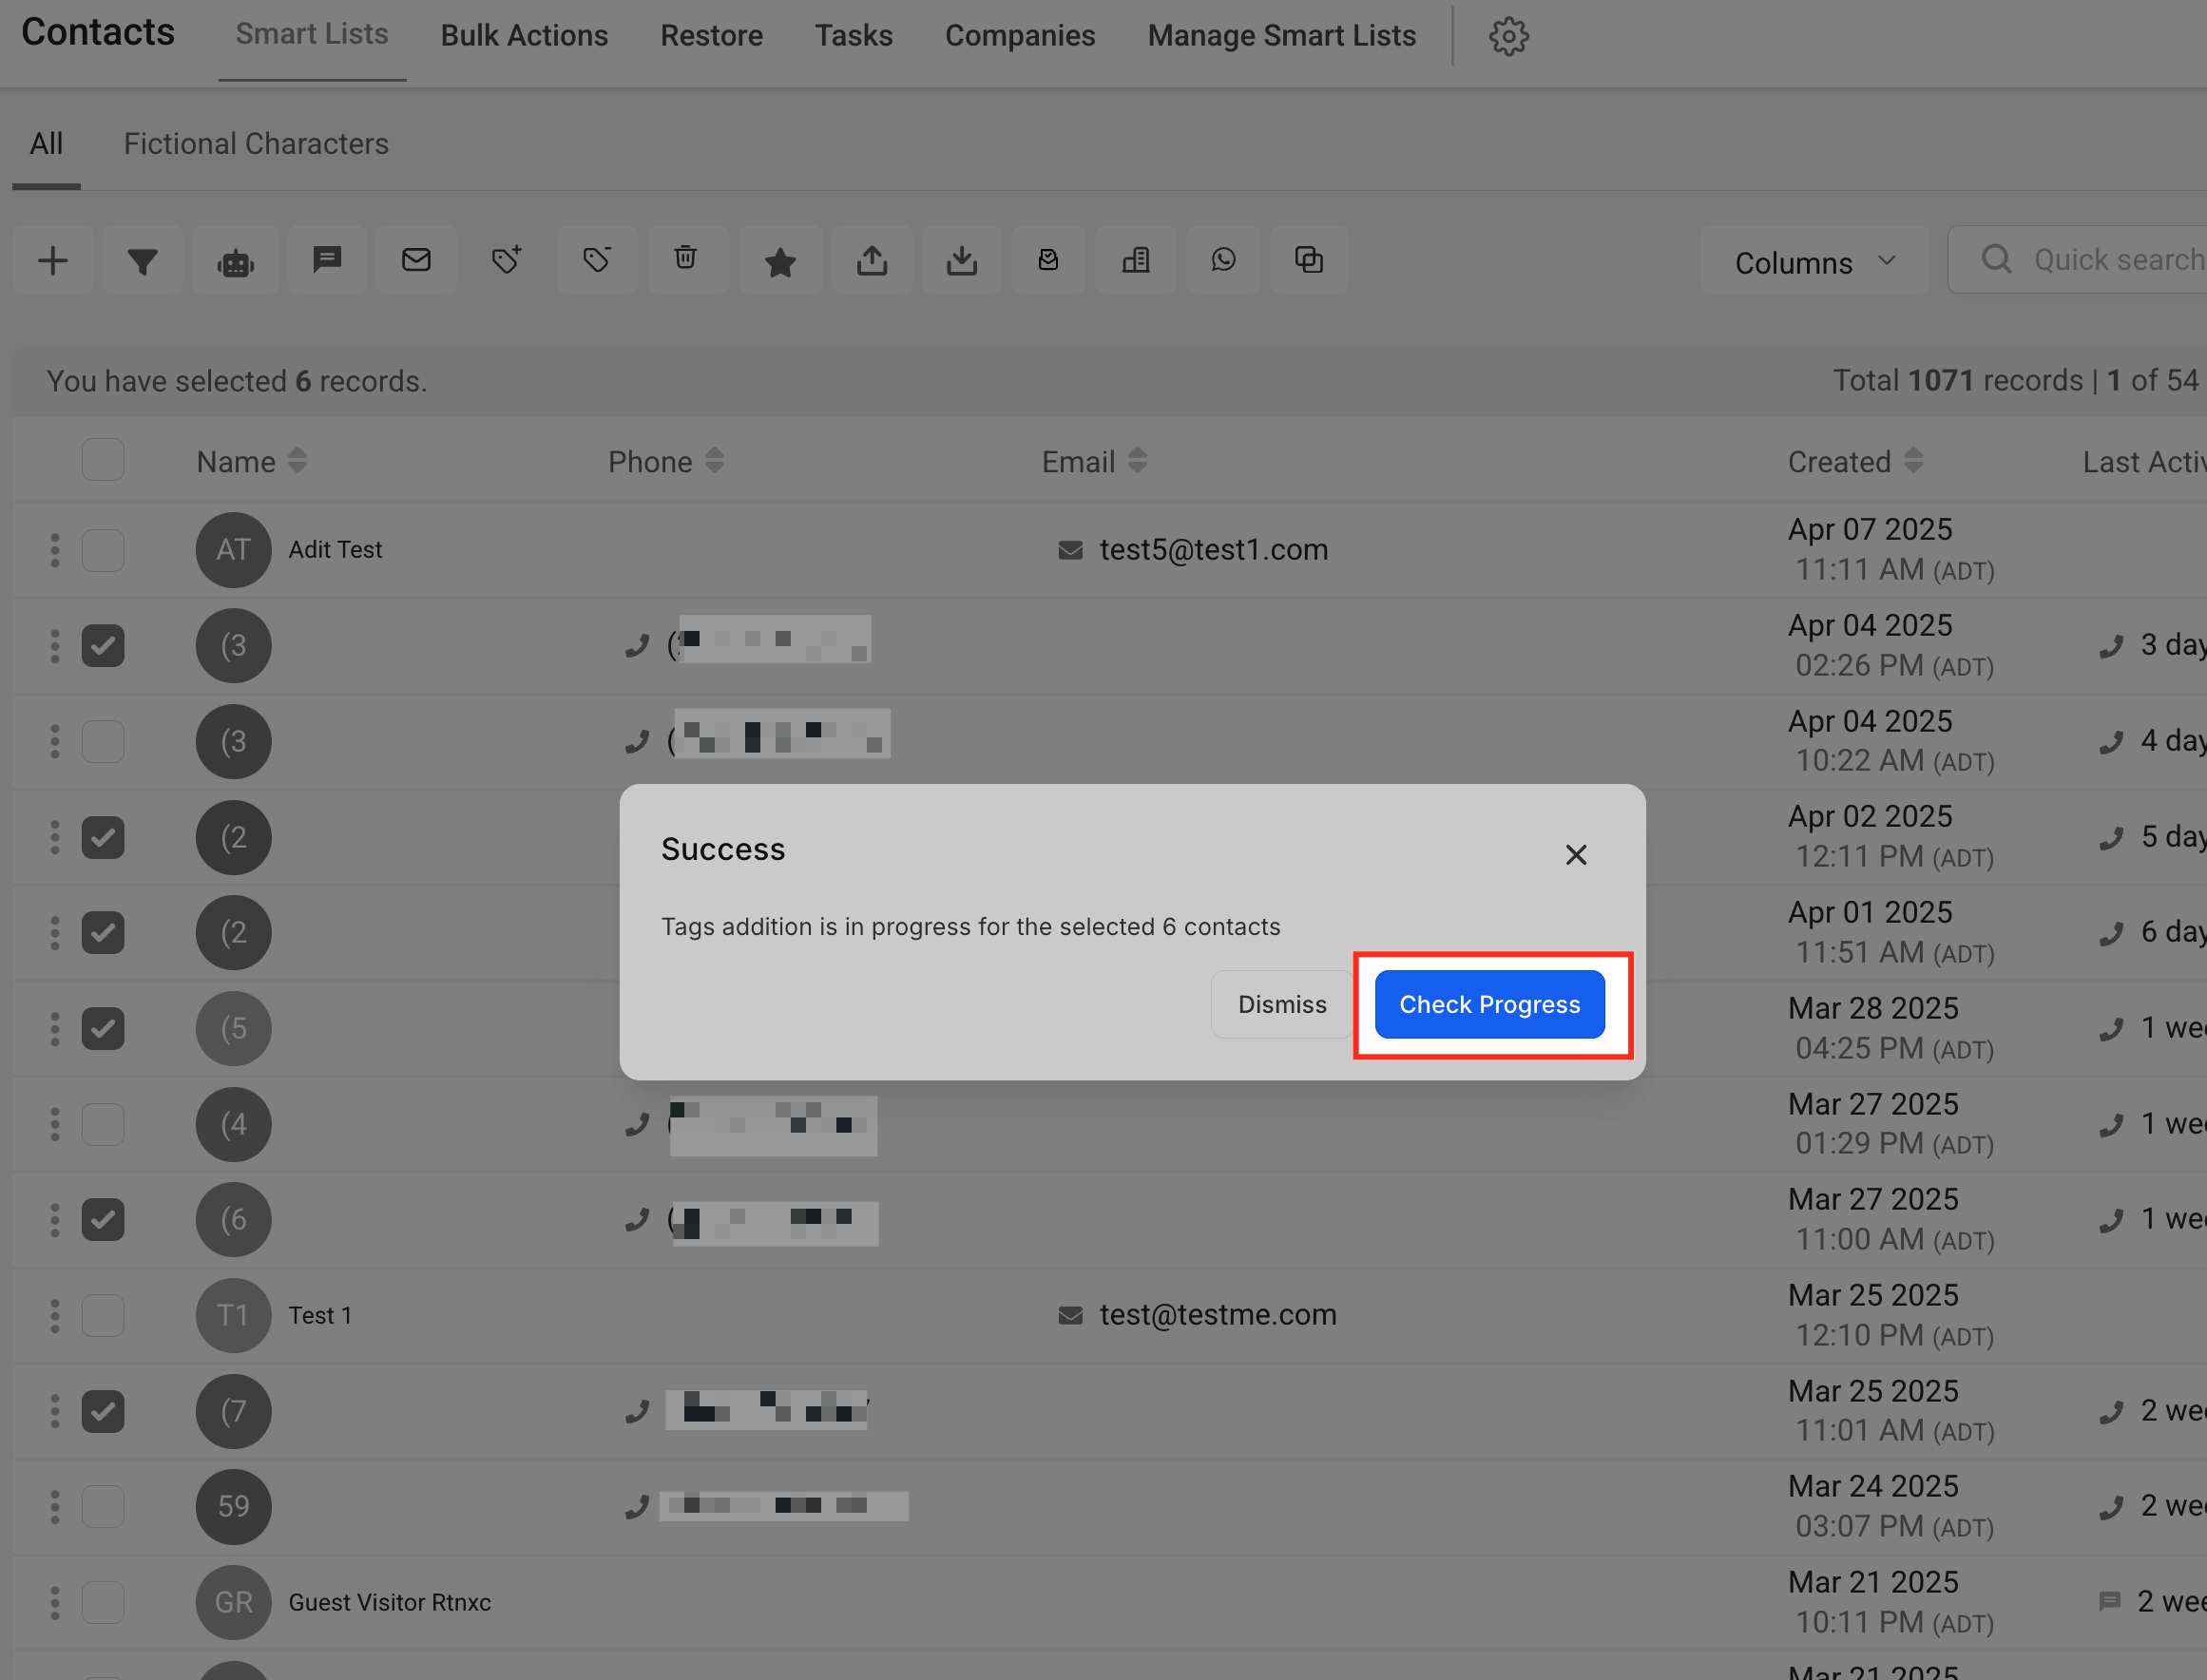
Section titled “6. Track Progress”A confirmation popup will appear right after clicking the button, informing you that the tag assignment is now in progress for the selected contacts in the background.
To monitor the operation in real-time, you can click the Check Progress button on the dialogue box. This will seamlessly redirect you to the master Bulk Actions tab where you can track the exact success or failure of the task.
7. Review the Bulk Action Status
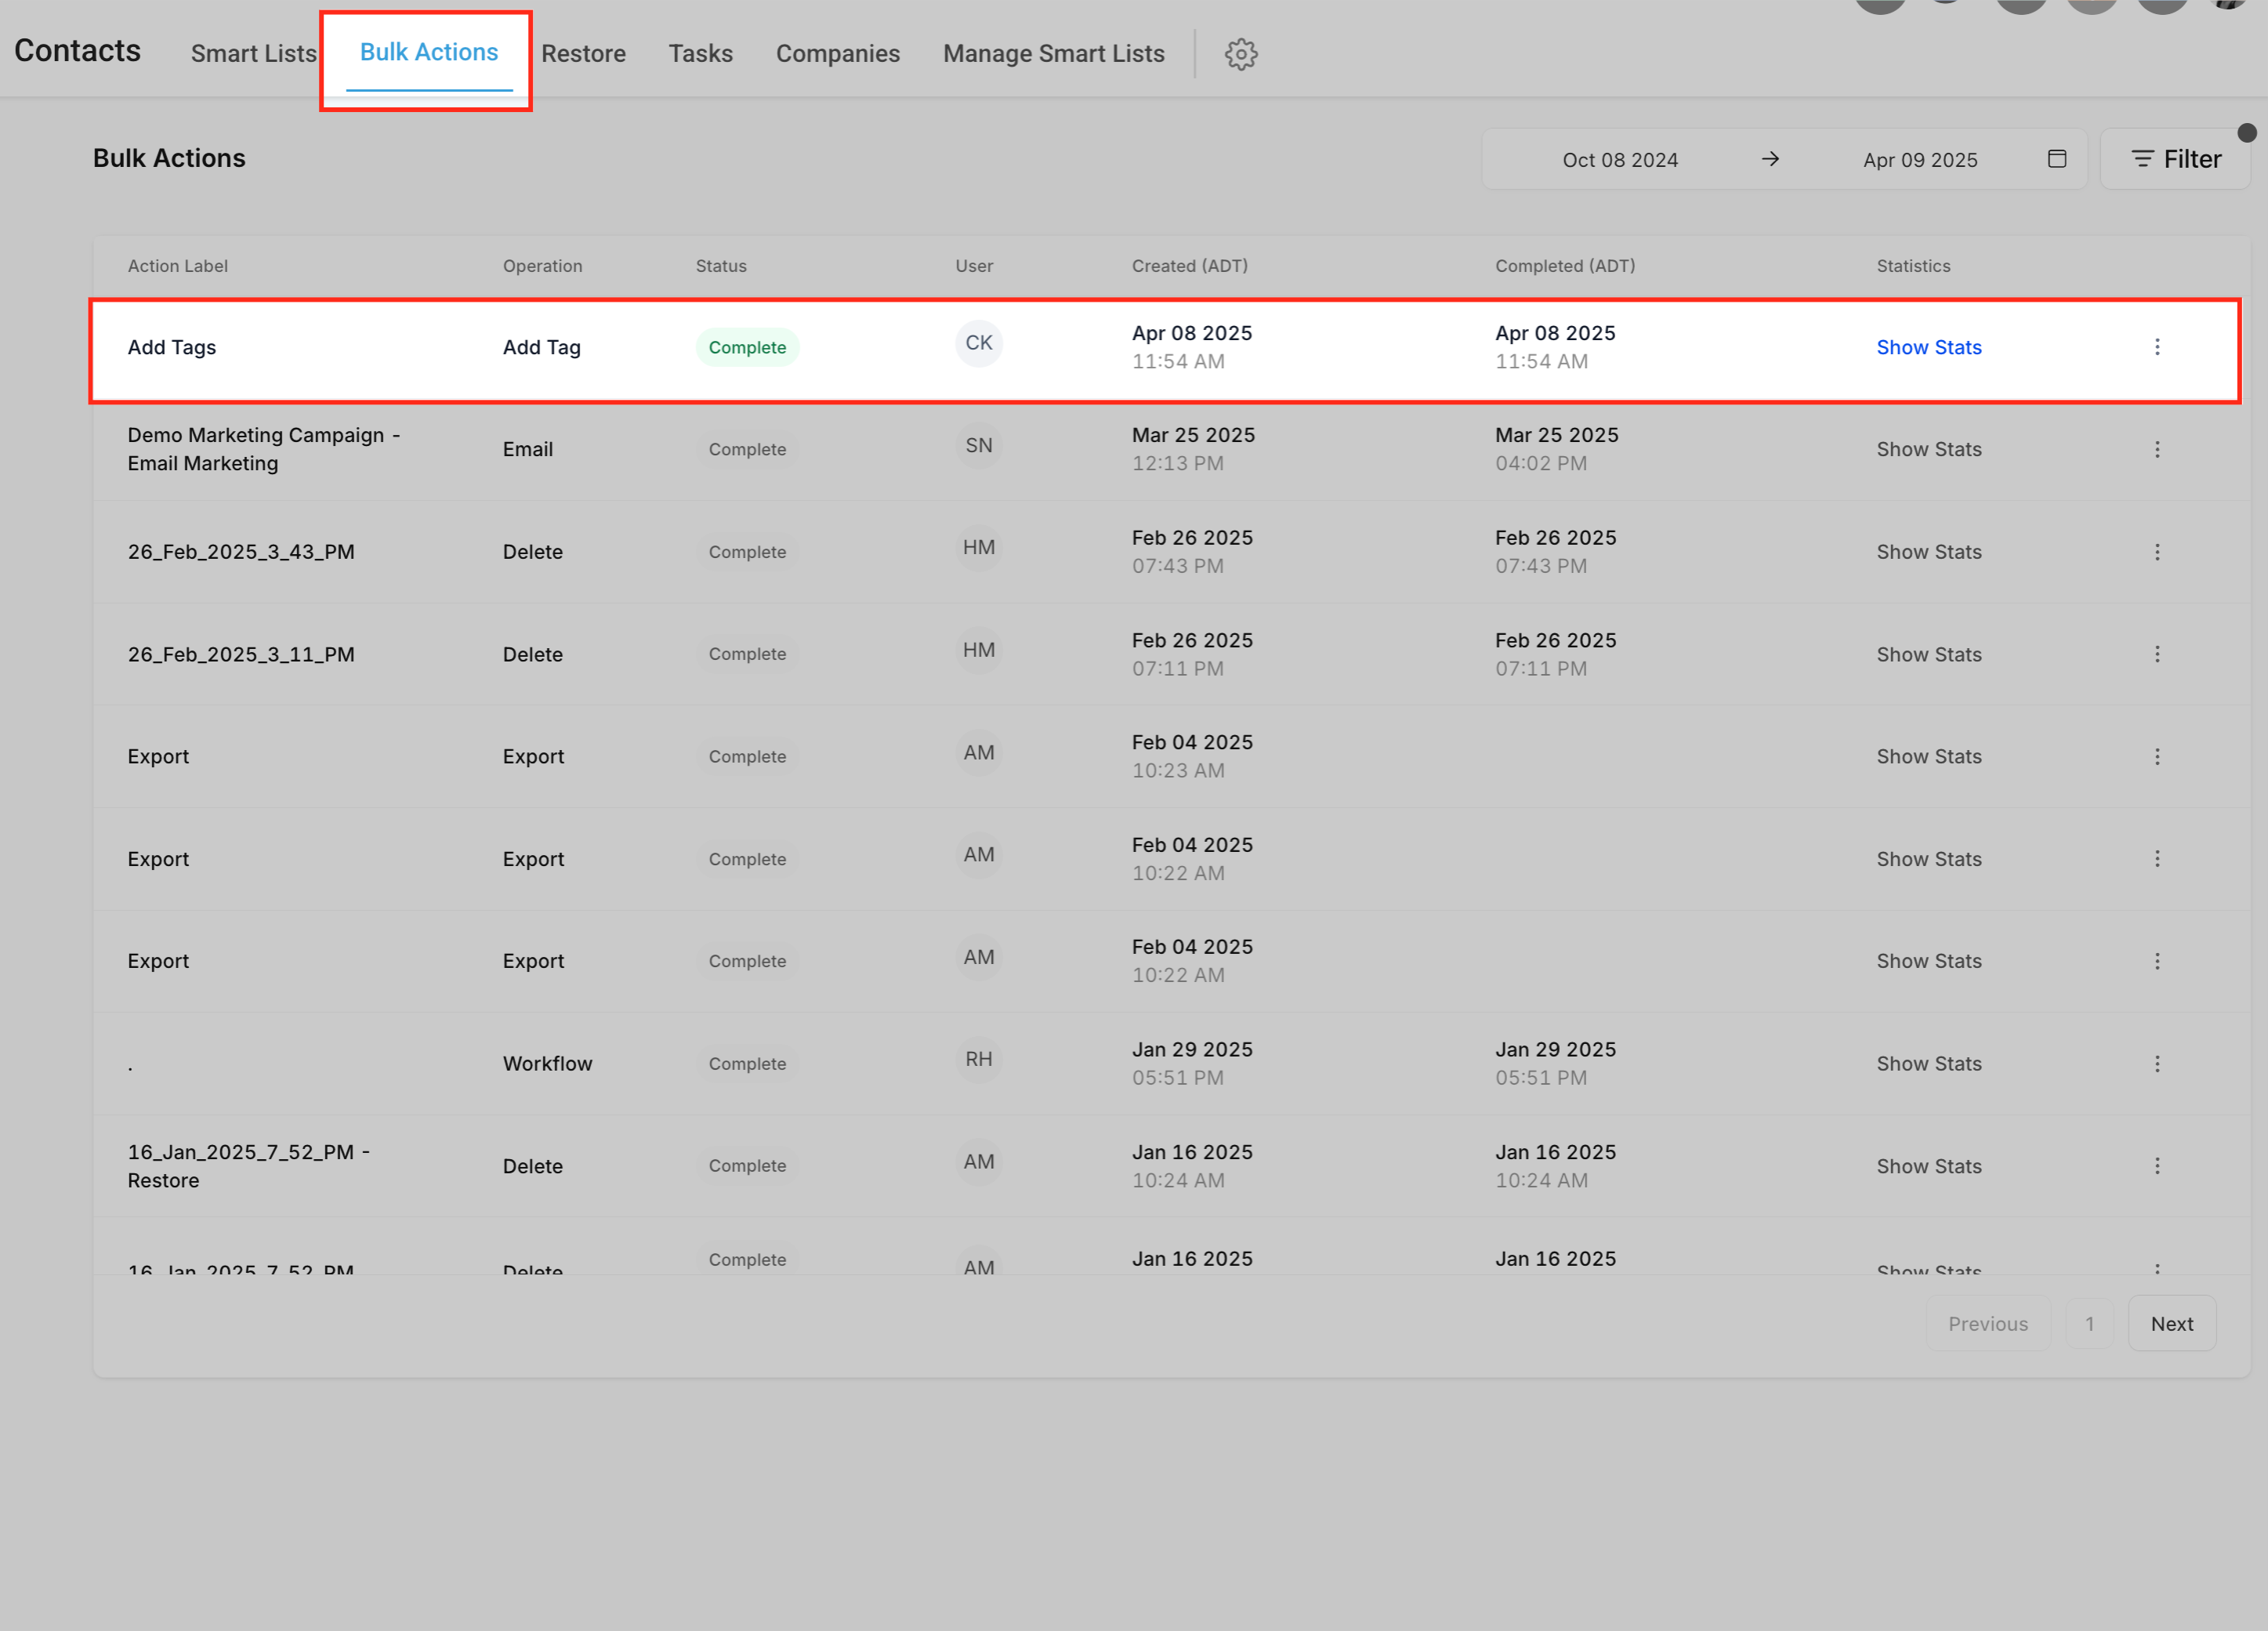
Section titled “7. Review the Bulk Action Status”In the Bulk Actions ledger, the highlighted area shows when your bulk tag action has been completed successfully. You’ll see the action name, the team member who initiated it, the start timestamps, and a Show Stats link to review the exact results of the task. This ensures absolute confidence that everything was applied to your contact list securely.
Frequently Asked Questions
Section titled “Frequently Asked Questions”Q: Can I apply multiple tags at once to a contact? Yes, you can confidently select and apply multiple tags simultaneously in a single bulk action. Simply add all desired tags into the Tags selection field before submitting the action form.
Q: Will this accidentally overwrite existing tags on the contact? No, adding tags in bulk behaves as an “append” action. It will only securely append the new selected tags alongside the contact’s existing tag list. It will never remove or delete pre-existing tags.
Q: Can I use bulk tagging to trigger automations? Absolutely. Tags are extremely common workflow triggers within automated sequences. Applying tags via bulk action will natively launch those contacts into the respective workflows precisely as if you had manually added the tag on their individual profiles.
Q: How do I undo or remove tags manually applied in bulk? To quickly remove tags from active contacts, you can execute the inverse “Remove Tag” bulk action. You can instruct the system to either pluck specific tags away or clear all tags entirely from the selected contacts.
Q: Can I see exactly which contacts were successfully tagged by the operation? Yes. Navigate to your Bulk Actions tab and click on the Show Stats label beside the relevant action row. This view provides total success status, contact identifiers, and granular timestamps for every single tagged record.