
Add Contact Form Upgrade and Customization
The Add Contact modal is designed for speed, data accuracy, and easy governance, ensuring you capture the right data points the very first time a contact is recorded.
Key Benefits of the Add Contact Modal
Section titled “Key Benefits of the Add Contact Modal”- Faster entry: A convenient slide-out UI keeps you on the same page while creating contacts.
- Cleaner data: Display only the fields your team needs, hiding unnecessary clutter.
- Higher quality: Set critical fields as required (e.g., Contact Type) to prevent incomplete records.
- Works with custom fields: Include contact-level custom fields to capture your unique data points at creation.
- Admin control: Administrators govern the layout to maintain consistent standards while users focus on their objectives.
Admin Permissions & Access
Section titled “Admin Permissions & Access”Limiting control of the layout to administrators protects your data model and keeps end-users focused on their tasks.
- Who can customize the layout? Admin-level users via their Roles & Permissions settings.
- Who can create contacts? Any user with access to the Contacts module can open the Add Contact workflow and use the configured layout.
Duplicates & Data Quality Tips
Section titled “Duplicates & Data Quality Tips”The quality of your contact intake depends on your deduplication settings. You can configure your preferences so new entries behave as expected.
- To control matching behavior, navigate to Settings → Business Profile → Contact Deduplication Preferences and choose primary/secondary match fields (such as Email or Phone).
- CSV imports natively check email and phone fields to merge matches, meaning duplicates cannot be accidentally created via CSV.
- If duplicates enter your system via forms or integrations, you can merge up to 10 contacts at once and designate a master record.
How To Customize the Add Contact Modal
Section titled “How To Customize the Add Contact Modal”Step 1: Open the Add Contact Sidebar
Section titled “Step 1: Open the Add Contact Sidebar”Navigate to Contacts → Smart Lists and click on + Add Contact to launch the modal.
Step 2: Customize the Form (Admins)
Section titled “Step 2: Customize the Form (Admins)”Click Customize Form to add or remove standard and custom fields. You can also drag and drop fields to reorder them.

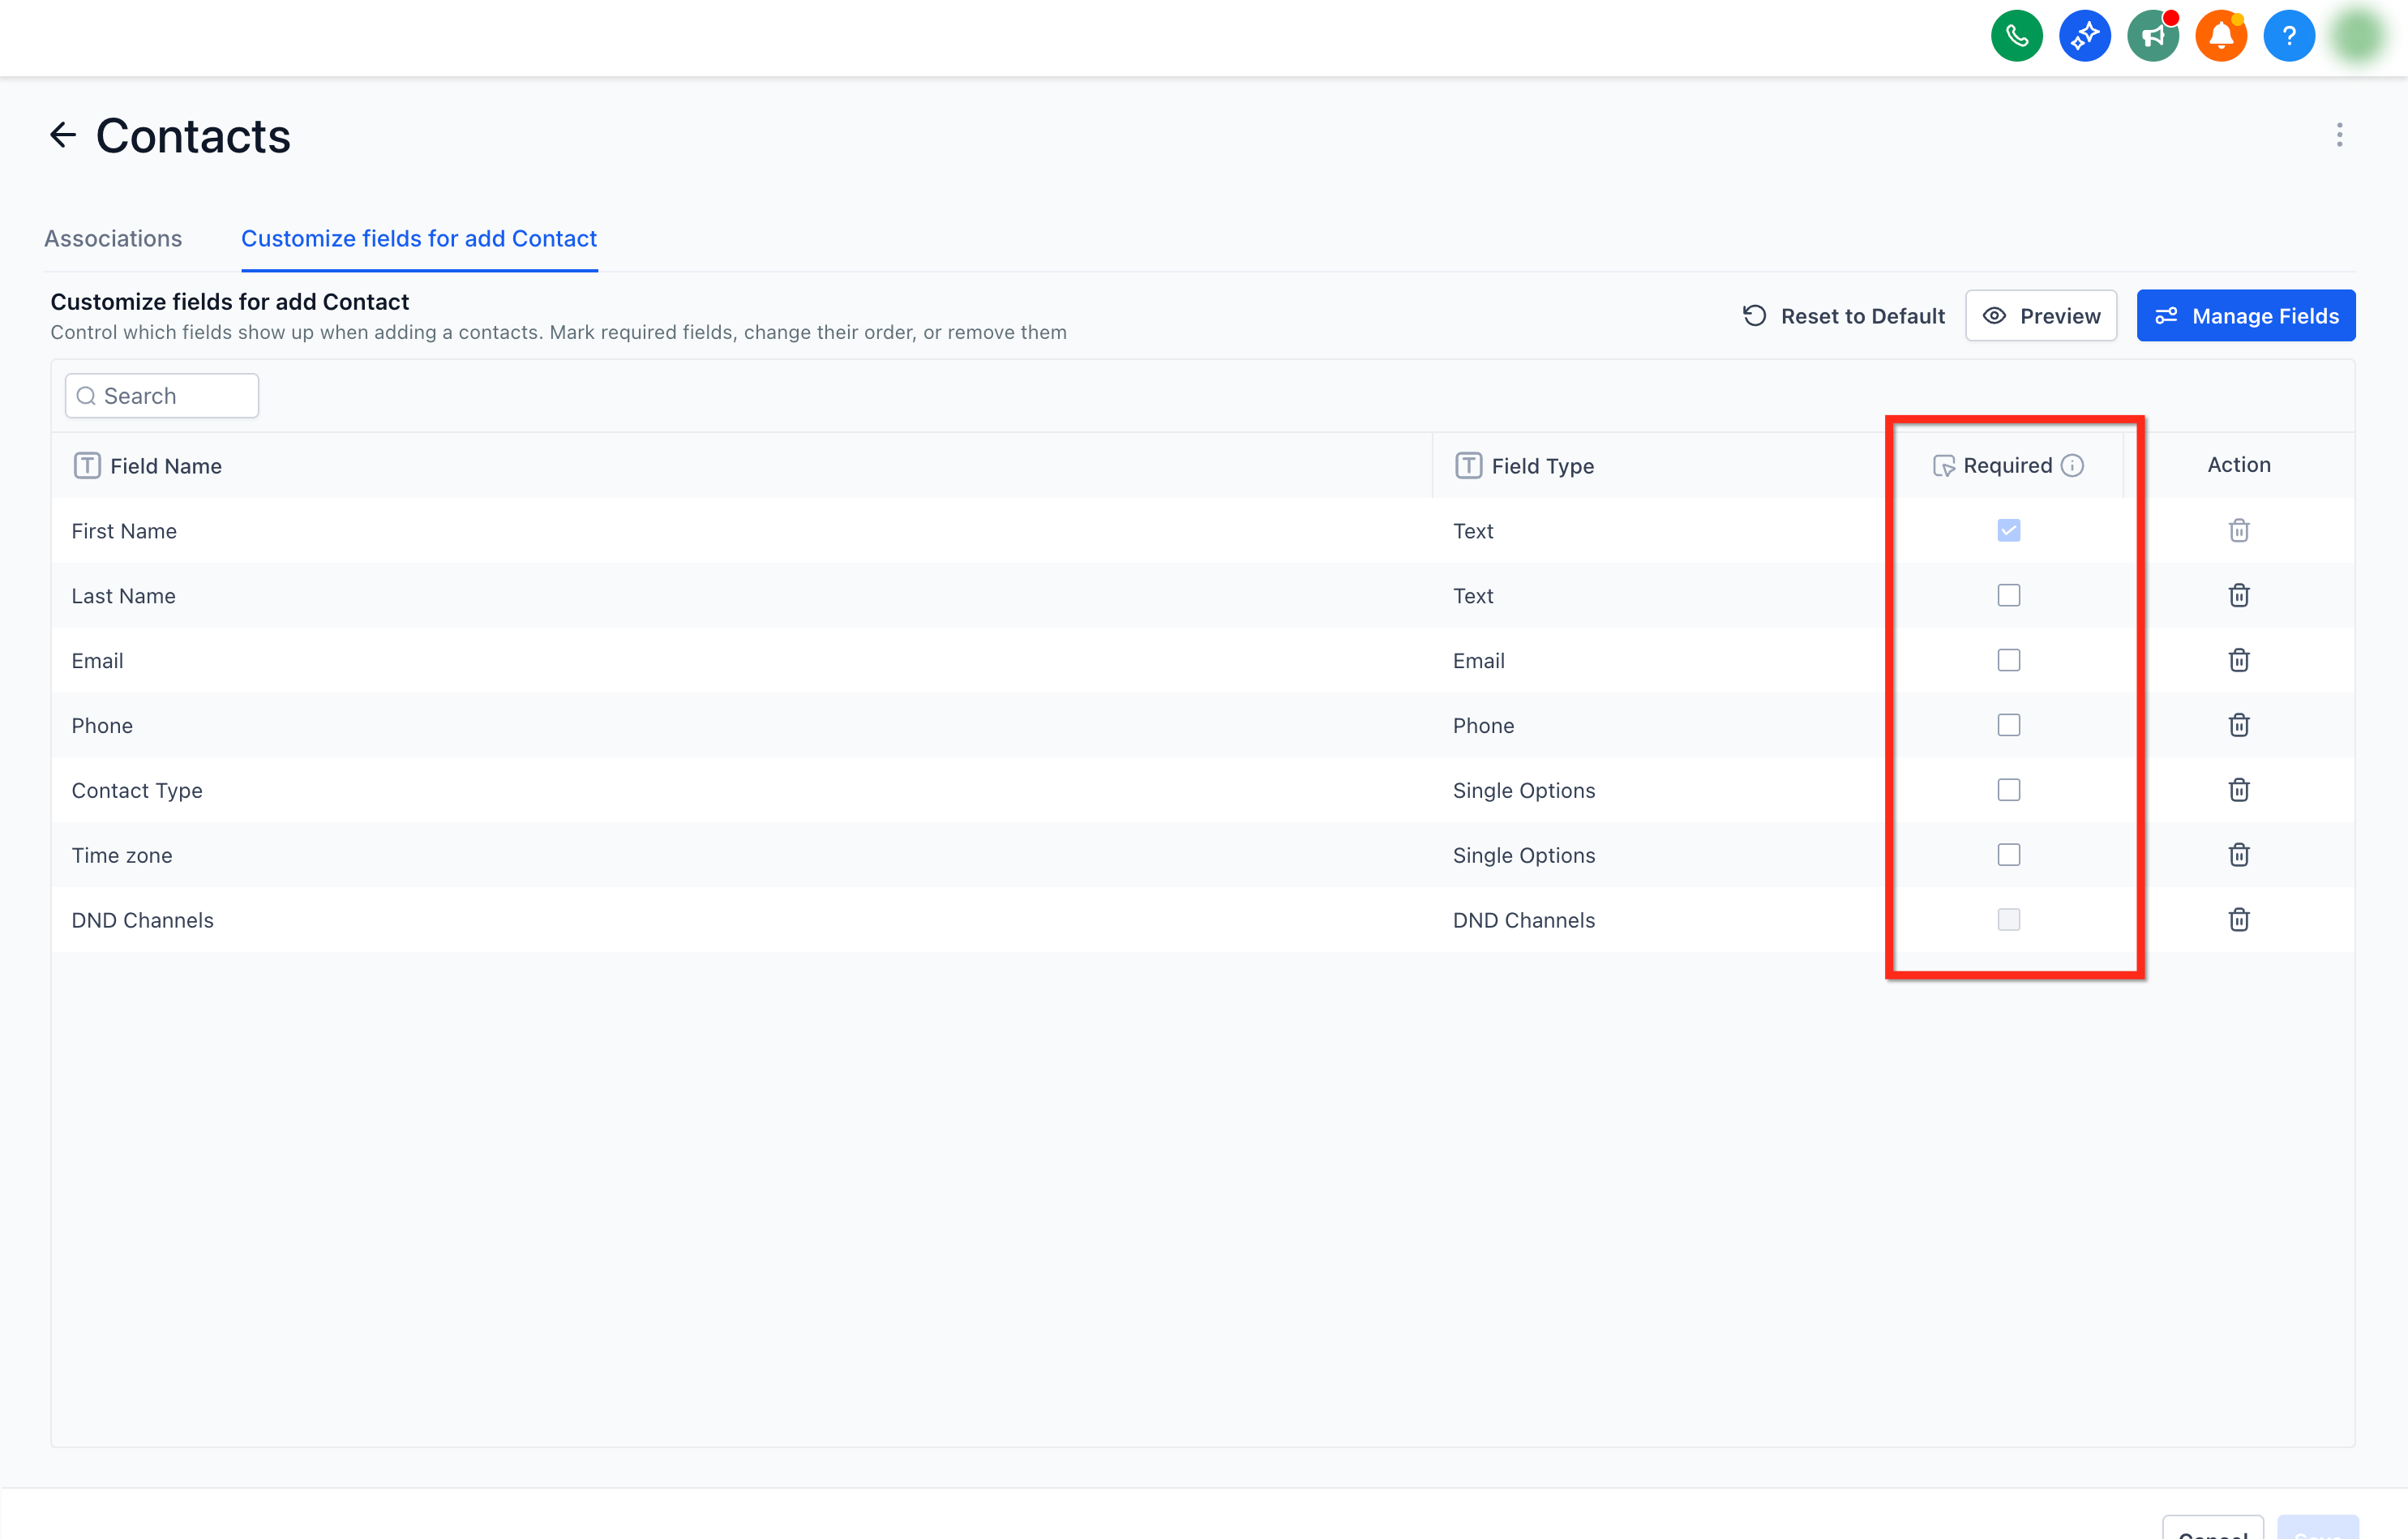
Step 3: Set Required Fields
Section titled “Step 3: Set Required Fields”Turn on Required for any critical field that must be completed before saving the contact.
Step 4: Preview & Save
Section titled “Step 4: Preview & Save”Use the Preview option to validate your layout, then save it for your team.

Step 5 (Optional): Automate Next Steps
Section titled “Step 5 (Optional): Automate Next Steps”Use a Contact Created trigger in your workflows to automatically send welcome messages, assign owners, or tag new contacts immediately.
Accessing the Add Contact Modal
Section titled “Accessing the Add Contact Modal”Every team member uses the same entry point to create new contacts.
- Go to Contacts → Smart Lists → + Add Contact to launch the slide-out modal.
- Provide all required information, then choose one of the following actions:
- Save: Creates the contact.
- Save & Add Another: Quickly enter rapid back-to-back entries.
- Cancel: Exit without saving.
Note: If you try to close the modal without saving, an unsaved-changes prompt will ask for confirmation before closing.